How to use your domain with iCloud mail
Apple has recently updated iCloud Mail to allow you to use custom domains, in this post I will show you how easy it is to setup your domain with the service.
First you will need to setup iCloud Mail on your devices
Section titled “First you will need to setup iCloud Mail on your devices”To setup an iPhone, iPad or iPod go to Settings -> “Your Name” -> iCloud and then turn on Mail.
To setup a Mac select the Apple menu -> System Preferences and then one of the following:
macOS 10.15 or later: click Apple ID -> iCloud -> Mail
macOS 10.14 or earlier: click iCloud -> Mail
Second you will need to setup iCloud Mail with your custom domain
Section titled “Second you will need to setup iCloud Mail with your custom domain”To be able to add a custom domain you will need to have an iCloud+ account.
Go to icloud.com
Select Account Settings
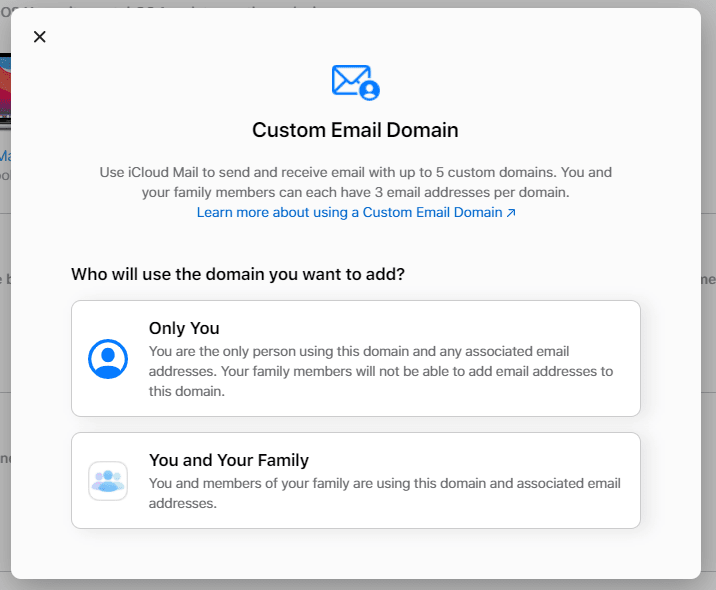
Locate Custom Email Domain and select Manage
You will be prompted to confirm who will be using the domain you will be adding.
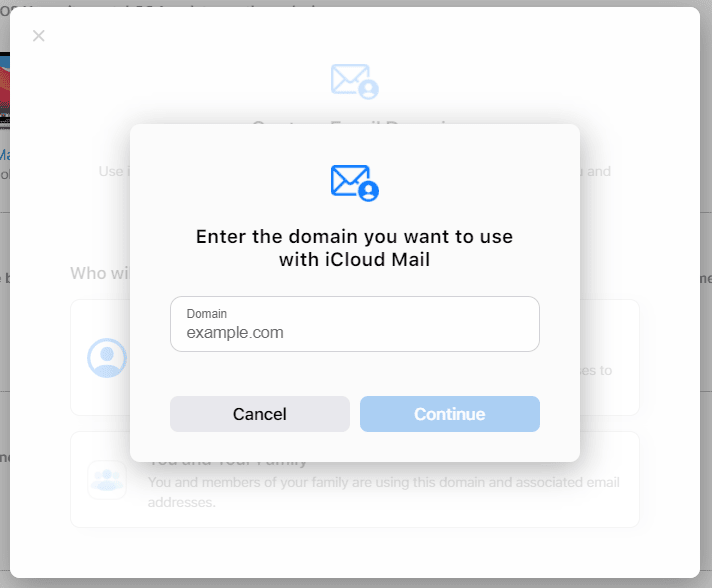
Next you will be asked to enter the domain name you wish to add, once entered click Continue.
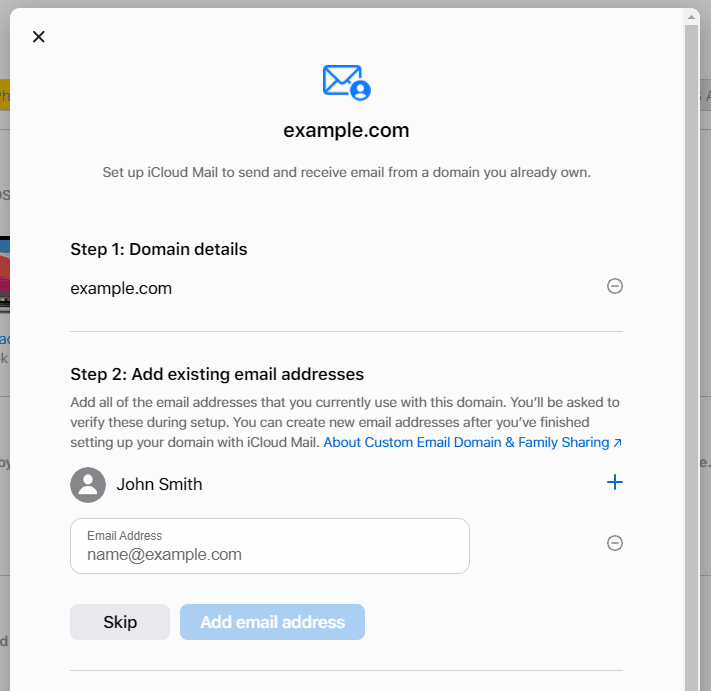
Now you can enter more email addresses or Skip onto the DNS setup.
The next step requires you to add or change the DNS records with your registrar or hosting provider, if your DNS is provided by us at UmbHost then this is easy, and below I will show you how to do that.
Add the iCloud Mail DNS records to UmbHost
Section titled “Add the iCloud Mail DNS records to UmbHost”Sign in to your My.UmbHost account
Go to DNS -> “domain name”
Add the following DNS records:
MX Name: @ Value: mx01.mail.icloud.com Priority: 10
MX Name: @ Value: mx02.mail.icloud.com Priority: 10
TXT Name: @ Value: Paste in the record provided during setup
TXT Name: @ Value: v=spf1 redirect=icloud.com
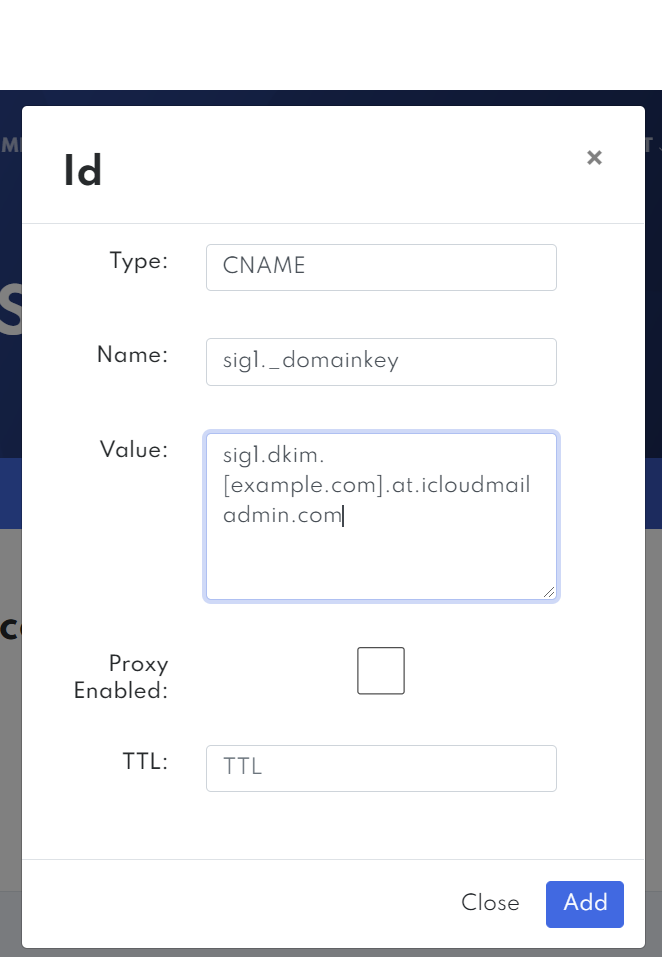
CNAME Name: sig1._domainkey Value: sig1.dkim.[example.com].at.icloudmailadmin.com Proxy Enabled: unchecked
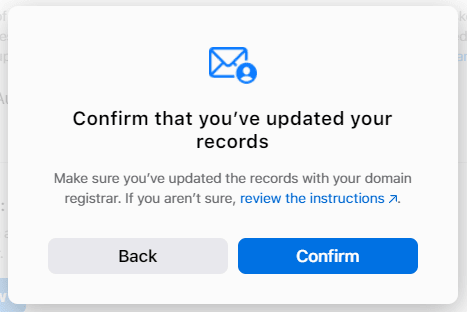
Back in iCloud click Finish set up
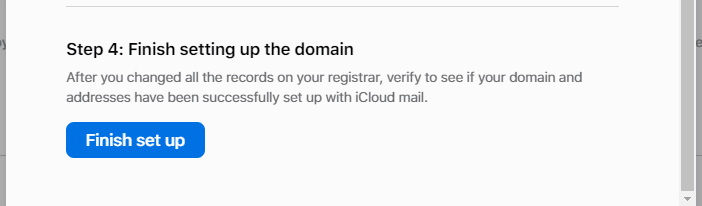
Then finally click Confirm and Apple will verify your DNS records.