This is the full developer documentation for UmbHost Knowledgebase
# Knowledgebase
> Guides, troubleshooting, and answers for UmbHost hosting, email, and domains.
## Current status & upcoming maintenance
[Section titled “Current status & upcoming maintenance”](#current-status--upcoming-maintenance)
STATUS/ LIVE SYNCING …
Checking status …
## Browse by category
[Section titled “Browse by category”](#browse-by-category)
[]()
[Account 1 article Managing your UmbHost account ](/account/)[Billing & Legal 3 articles Invoices, payments, terms, and policies ](/billing-legal/)[CDN 5 articles Content delivery network setup and tuning ](/cdn/)[CI/CD 4 articles Continuous integration and deployment workflows ](/ci-cd/)[Databases 9 articles Backups, restores, and database administration ](/databases/)[Domain Names & DNS 7 articles Registering domains and configuring DNS records ](/domain-names-dns/)[Email & SMTP 7 articles Mailbox setup, SMTP, and client configuration ](/email-smtp/)[FTP, Web Deploy & Git 9 articles Deploying and managing files on your hosting ](/ftp-web-deploy-git/)[GreenStack 27 articles Guides for the GreenStack platform ](/greenstack/)[Hosting 29 articles Plans, control panel, and server configuration ](/hosting/)[Migrations 3 articles Moving sites and data into UmbHost ](/migrations/)[SSL Certificates 4 articles Issuing, renewing, and troubleshooting SSL ](/ssl-certificates/)[UmbCheckout 9 articles Setup and usage guides for UmbCheckout ](/umbcheckout/)
# Page not found
> The page you were looking for could not be found.
We couldn’t find the page you were looking for.
Looking for an article from the old knowledgebase?
We have migrated our articles from our previous knowledgebase. If you arrived here from an old link, the url has likely changed, you can use the search at the top to find the article in our new knowledgebase.
## Browse the knowledgebase
[Section titled “Browse the knowledgebase”](#browse-the-knowledgebase)
[Account 1 article Managing your UmbHost account ](/account/)[Billing & Legal 3 articles Invoices, payments, terms, and policies ](/billing-legal/)[CDN 5 articles Content delivery network setup and tuning ](/cdn/)[CI/CD 4 articles Continuous integration and deployment workflows ](/ci-cd/)[Databases 9 articles Backups, restores, and database administration ](/databases/)[Domain Names & DNS 7 articles Registering domains and configuring DNS records ](/domain-names-dns/)[Email & SMTP 7 articles Mailbox setup, SMTP, and client configuration ](/email-smtp/)[FTP, Web Deploy & Git 9 articles Deploying and managing files on your hosting ](/ftp-web-deploy-git/)[GreenStack 27 articles Guides for the GreenStack platform ](/greenstack/)[Hosting 29 articles Plans, control panel, and server configuration ](/hosting/)[Migrations 3 articles Moving sites and data into UmbHost ](/migrations/)[SSL Certificates 4 articles Issuing, renewing, and troubleshooting SSL ](/ssl-certificates/)[UmbCheckout 9 articles Setup and usage guides for UmbCheckout ](/umbcheckout/)
# How can I give a user access to my account?
> You can invite your user to access your service in UmbPanel using the Manage Invitations area of the service.
You can invite your user to access your service in [UmbPanel](https://www.umbpanel.io).
Browse to the service you wish to grant access to and click on “Manage Invitations”:
Once in this area click the “Invite” button in the top right:
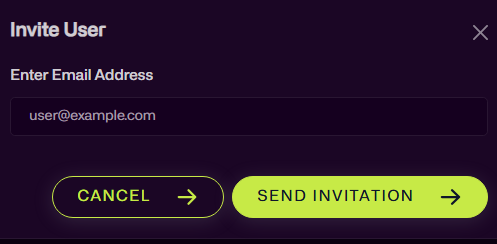
And then fill out the form to send an invite:
# Are you registered with the Information Commissioner's Office (ICO)?
> Yes, as per the GDPR/Data Protection Act 2018, we are registered with the ICO, our registration number is: ZB240329 you can search the register here. You
Yes, as per the **GDPR/Data Protection Act 2018,** we are registered with the [ICO](https://ico.org.uk/), our registration number is: **ZB240329** you can [search the register here](https://ico.org.uk/about-the-ico/what-we-do/register-of-fee-payers/).
You can [view our profile in the register here](https://ico.org.uk/ESDWebPages/Entry/ZB240329).
# How do I cancel a hosting package?
> Open the service in UmbPanel and click Request Cancellation under Cancel Service. The cancellation starts at the end of the current billing period.
You can cancel your hosting package by opening the service in [UmbPanel](https://www.umbpanel.io) and clicking **Request Cancellation** under **Cancel Service**. Only the owner of the service can cancel it.
The cancellation will start at the end of the current billing period unless immediate cancellation is requested.
The 30 day money back guarantee is only valid for the first 30 days of the hosting package creation.
# How do I claim my free developer/staging hosting package?
> Once you have purchased UmbOne, [open a support ticket](https://www.umbpanel.io/support-tickets/new) in UmbPanel to make this request, choosing your UmbOne service as the **Related Service**. Please note the free developer/staging hosting package is for non-public
Once you have purchased UmbOne, [open a support ticket](https://www.umbpanel.io/support-tickets/new) in UmbPanel to make this request, choosing your UmbOne service as the **Related Service**.
Please note the free developer/staging hosting package is for non-public websites, and only supports a subdomain which is provided by us.
# Can I enable / disable Always Online?
> Yes, if your service is using a full Cloudflare Zone. Please open a support ticket to request a change.
Yes, if your service is using a full Cloudflare Zone.
You can [learn more](https://support.cloudflare.com/hc/en-us/articles/200168436) about Always Online here:
Please open a support ticket to a change.
# Can I temporarily disable the CDN?
> Yes, if you have a full Cloudflare Zone with us, we can enable Development Mode on your zone, this will disable the CDN for three (3) hours.
Yes if you have a full Cloudflare Zone with us, we can enable Development Mode on your zone, this will disable the CDN for three (3) hours.
You can [learn more](https://support.cloudflare.com/hc/en-us/articles/200168246-Understanding-Cloudflare-Development-Mode) about Development Mode here:
Please open a support ticket to enable this.
# Can the Browser Cache TTL be increased / decreased?
> Yes, if you have a Full Cloudflare zone with us. By default this is set to 4 hours, and can be changed from 30 minutes up to 1 year.
Yes if you have a Full Cloudflare zone with us, by default this is set to 4 hours, however you can choose from one of the following:
* Respect Existing Headers
* 30 minutes
* 1 hour
* 2 hours
* 3 hours
* 4 hours
* 5 hours
* 8 hours
* 12 hours
* 16 hours
* 20 hours
* 1 day
* 2 days
* 3 days
* 4 days
* 5 days
* 8 days
* 16 days
* 24 days
* 1 month
* 2 months
* 6 months
* 1 year
Please open a support ticket to request this change
# Can the CDN caching level be changed?
> Yes, if you have a Full Cloudflare Zone with us the CDN caching level can be set to No Query String, Ignore Query String or Standard.
Yes if you have a Full Cloudflare Zone with us, the CDN caching level can be set to these levels:
* **No Query String:** Only delivers files from cache when there is no query string.
* **Ignore Query String:** Delivers the same resource to everyone independent of the query string.
* **Standard:** Delivers a different resource each time the query string changes.
We recommend the Standard level. [Learn more](https://support.cloudflare.com/hc/articles/200168256)
By default, our CDN does not cache HTML content.
Please open a support ticket to request the caching level to be changed or to enable HTML caching.
# How can I purge the CDN cache?
> Login to UmbPanel, browse to your service and click on the Manage CDN button, then choose the hostname and purge the CDN as required.
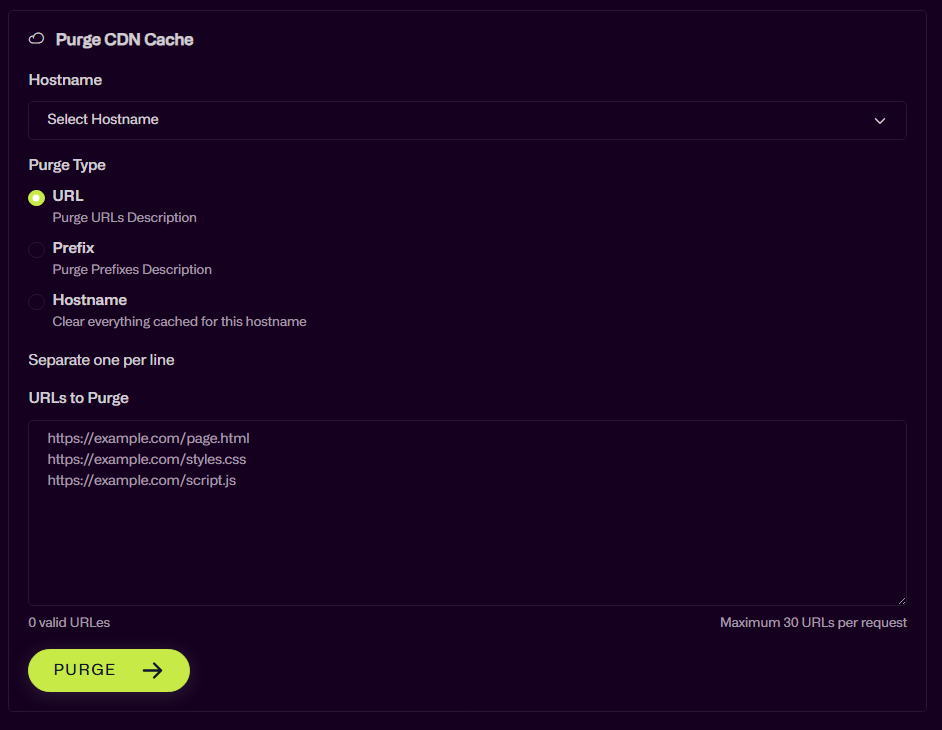
Login to [UmbPanel](https://www.umbpanel.io) and browse to the service which you would like to purge the CDN for and then click on the “Manage CDN” button:

> **Note:** If you cannot see the button, open a support ticket, we may need to relink your account to Cloudflare.
Once in the Manage CDN area you can choose the Hostname from the dropdown and then purge the CDN as required.
# Can I use TeamCity with your hosting?
> Yes! You must use TeamCity with the Web Deploy configuration. You can find an example of how to do this on the Jetbrains website
Yes!
You must use TeamCity with the Web Deploy configuration.
You can find an example of how to do this on the Jetbrains website:
*We do not have and cannot install the TeamCity deployment agent on our servers.*
To get started please [open a support ticket](https://www.umbpanel.io/support-tickets/new) in UmbPanel.
# Can you help with Azure DevOps pipelines?
> Yes! We can provide a starter YAML file which can be used with Umbraco 7, 8, 9 and 10+ The steps our starter YAML CI/CD can carry out are: Checkout (inc
Yes!
We can provide a starter YAML file which can be used with Umbraco 7, 8, 9 and 10+
The steps our starter YAML CI/CD can carry out are:
* Checkout (inc submodules)
* Generate CSS from SASS
* Build using MSBuild
* Deploy using Web Deploy
* Tag repo on completion
To get started please [open a support ticket](https://www.umbpanel.io/support-tickets/new) in UmbPanel.
# Can you help with GitHub Actions workflows?
> Yes! We can provide a starter YAML file which can be used with Umbraco 7, 8, 9 and 10+ The steps our starter YAML CI/CD can carry out are: Checkout (inc
Yes!
We can provide a starter YAML file which can be used with Umbraco 7, 8, 9 and 10+
The steps our starter YAML CI/CD can carry out are:
* Checkout (inc submodules)
* Generate CSS from SASS
* Build using MSBuild
* Deploy using Web Deploy
* Tag repo on completion
To get started please [open a support ticket](https://www.umbpanel.io/support-tickets/new) in UmbPanel.
# My deployments failed due to a lock *.dll file, how do I fix this?
> When your website is running on Windows the DLL files can become locked, whilst the recommended approach is to use an app offline file, this may not
When your website is running on Windows the DLL files can become locked, whilst the recommended approach is to use an [app offline file](https://learn.microsoft.com/en-us/aspnet/core/host-and-deploy/app-offline?view=aspnetcore-6.0), this may not always be enough to resolve the failed deployments.
In these situations you can add a `web.config` file into your web project to enable [Shadow Copying](https://learn.microsoft.com/en-us/dotnet/framework/app-domains/shadow-copy-assemblies), the following can be used as a starting point:
```xml
```
# Can I set my database hostname as ‘localhost’?
> No, you would need to set the database hostname as the server that it's on at UmbHost. You can find this by going to the SQL Databases area within your
No, you would need to set the database hostname as the server that it’s on at UmbHost.
You can find it in [UmbPanel](https://www.umbpanel.io): open your service, click **Manage MSSQL Databases**, then **Details**. The hostname is shown as **Server Name**.
‘localhost’ generally means the MySQL databases are hosted on the same server as the websites, which is quite common in the web hosting industry with hosts that have a ‘single-server’ approach where all services run from the same machine.
It’s different at UmbHost as we split all services and have a strict ‘one server, one rule’ policy.
At the UmbHost data centres, web traffic and MSSQL traffic are all different machines, so ‘localhost’ doesn’t work.
# Can my database be restored from a bacpac file?
> We will happily restore your database from a bacpac file. Please open a support ticket to request this.
We will happily restore your database from a bacpac file.
Please open a support ticket to request this.
# Can you restore my database from my old/current SQL server?
> We will happily restore your database from your old/current SQL server. Please open a support ticket to request this, being sure to include your
We will happily restore your database from your old/current SQL server.
Please open a support ticket to request this, being sure to include your old/current server credentials.
NOTE: You may be required to add our SQL server IP Address to your old/current server to allow us access.
# How do I connect to my database via .NET?
> A website built using .NET can be connected to databases of different types: MSSQL, and Access databases. You need to use a specific connection string to
A website built using .NET can be connected to databases of different types: MSSQL, and Access databases.
You need to use a specific connection string to connect to each database type:
**MSSQL**
* Server=myServerAddress;Database=myDataBase;User Id=myUsername;Password=myPassword;
As long as the placeholders in the above are replaced with your actual database connection details, it should allow a connection to the database.
# How do I manage my Microsoft SQL database?
> We recommend using SQL Server Management Studio (SSMS) for managing your Microsoft SQL databases. This industry-standard software provides a comprehensive
We recommend using SQL Server Management Studio (SSMS) for managing your Microsoft SQL databases.
This industry-standard software provides a comprehensive environment for Microsoft SQL database creation, access, configuration, development, and other management features. It includes a variety of components including visual database tools, code and text editors, object management, boilerplate text management, and more. With SSMS you can deploy, monitor, and upgrade the data-tier components used by your applications, as well as build queries and scripts.
SSMS also helps you download and back up your MS SQL databases, which we recommend you do at regular intervals in the interests of best practice security.
You can download the software for free on the [Microsoft SSMS download page](https://docs.microsoft.com/en-us/sql/ssms/download-sql-server-management-studio-ssms).
To connect remotely you will need to use Server ‘mssql.umbhost.net’.
You will also need to enter your database name in the “**Connect to database**” field found under “**Options**” or “**Connection Properties**”.
# How do I restore my database?
> The recommended approach is to restore your site using uSync, alternatively send us a .BAK or .Bacpac file, or script the database yourself.
The recommended approach is to restore your site using [uSync](https://marketplace.umbraco.com/package/usync), alternatively you can open a support ticket and send us either a .BAK or .Bacpac file to restore on your behalf.
If you would prefer to restore the database yourself you can follow the scripting steps outlined below:
You will need to export your database using Generate Scripts with some advanced settings configured for the restore to complete successfully.
Alternatively you may find it easier to request us to restore your [database using a bacpac file](/databases/can-my-database-be-restored-from-a-bacpac-file/), or [directly from your old SQL server](/databases/can-you-restore-my-database-from-my-old-current-sql-server/).
Export database to \*.sql script
1. Right-click on the database that should be exported.
2. “Tasks” -> “Generate Scripts…” - A Generate and Publish Scripts popup should appear

3. On the “Introduction” screen click the “Next >” button - “Choose Objects” screen will appear;

4. On the “*Choose Objects*” screen you select the “**Select specific database objects**” option, and then tick “**Tables**” and click “**Next >**” - “*Set Scripting Options*” screen should appear;

5. On the “*Set Scripting Options*” choose “**Save to file**” and then click “**Advanced**”.

In the Advanced Scripting Options Window scroll down the list of options, you will need to set “**Types of data to script**” to “**Schema and data**”.
You will also need to enable the Index creation, the minimum required for Umbraco is “**Script Full-Text Indexes**” and **“Script Indexes”**

Click the “**Next >**” button.
6. On the “Summary” screen the options you have previously selected and if you are satisfied with them, click the “**Next >**” button.
#### Import database from \*.sql script
[Section titled “Import database from \*.sql script”](#import-database-from-sqlscript)
1. **Open** the *\*.sql* script with Microsoft SQL Server Management Studio
2. 1. In the *\*.sql* script, the first two rows should be something similar to
`USE [DatabaseName]`
`GO`
Here in the brackets, you can *use the name of the database* you would like to populate.
`USE [**YourDatabaseName**]`
`GO`
2. Click the ”**! Execute**” button, or use the **F5** shortcut for it.
3. After a successful execution of the Query, you should find your newly populated database.
# I'm receiving error "SqlException (0x80131904): A connection was successfully established with the server, but then an error occurred during the login process.", how do I fix it?
> When trying to connect to our SQL servers you may receieve the following error: SqlException (0x80131904): A connection was successfully established with
When trying to connect to our SQL servers you may receieve the following error:
`SqlException (0x80131904): A connection was successfully established with the server, but then an error occurred during the login process. (provider: SSL Provider, error: 0 - The certificate chain was issued by an authority that is not trusted.)]`
This is happening due to the setup of our hosting, all the traffic between the web servers and the database occurs internally using an internal IP address, due to this the SSL certificate does not match.
To resolve the above error please add the following line onto the end of your database connection string:
`Encrypt=false;`
# What is the database containment type?
> All of our databases use the "Partial" containment type. You can learn more about contained databases here
All of our databases use the “**Partial**” containment type.
You can learn more about contained databases here:
# Where do I find my MSSQL Database information?
> Login to your UmbPanel account, browse to the service the database is associated with and click on the Manage MSSQL Databases button.
To find your MSSQL Database information login to your [UmbPanel](https://www.umbpanel.io) account, browse to the service which they are associated with and click on the “Manage MSSQL Databases” button.

# Can I use my own Cloudflare account?
> Yes. Add the CNAME records shown in UmbPanel, then set SSL/TLS to Full, the minimum TLS version to 1.2 and the Browser Cache TTL to at least 8 days.
Yes, you will need to configure your account exactly as below:
1. Add the following DNS records:
| | | | |
| -------- | -------- | ----------------------------------- | ---------------------------- |
| **Host** | **Type** | **Value** | **Cloudflare Proxy Enabled** |
| @ | CNAME | **\[SHOWN IN UMBPANEL, SEE BELOW]** | Yes |
| www | CNAME | @ | Yes |
You can find the CNAME value in [UmbPanel](https://www.umbpanel.io): open your service, click **Manage Hostnames**, and copy the **Record** under **Point your domain at us**.
2. Browse to the SSL/TLS -> Overview section and change the **SSL/TLS encryption** to **“Full”**


3. Browse to the SSL/TLS - > Edge Certificates section and change the **Minimum TLS Version to 1.2** and we recommend enabling the **Always Use HTTPS** setting
4. Browse to the Caching -> Overview section and change the **Browser Cache TTL** to a minimum of **8 Days**
# Can I use my own non-Cloudflare DNS provider?
> Yes. Add your hostname in UmbPanel, create the validation records it shows at your DNS provider, validate it, then point your domain at us.
Yes. You can set this up yourself in [UmbPanel](https://www.umbpanel.io):
1. Open your service and click **Manage Hostnames**.
2. Click **Add Hostname** and enter your domain. On Windows hosting the button is **Request Hostname**, which sends the request to our support team, who will reply with the records to add.
3. Add the **SSL Validation CNAME** and **Validation TXT Record** shown in UmbPanel at your DNS provider.
4. Once they’re in place, click **Validate Hostname**.
5. Point your domain at us using the records shown under **Point your domain at us**. For a subdomain such as `www`, add the CNAME record. For the root of your domain, use an ALIAS or ANAME record if your provider supports one, otherwise add the A records shown.
**PLEASE NOTE:** A records are **not** covered by our 99.9% uptime SLA. The IP addresses used for A records can change, which is outside our control, so check UmbPanel again if your site becomes unreachable. Use a CNAME (or ALIAS / ANAME) record wherever you can.
If you get stuck, [open a support ticket](https://www.umbpanel.io/support-tickets/new) and we’ll guide you through it.
# How do I add DNS records?
> If we have configured a full Cloudflare DNS zone for you, you can manage your DNS records from the Manage DNS button in UmbPanel.
If we have configured a full Cloudflare DNS zone for you, login to [UmbPanel](https://www.umbpanel.io). If the domain is registered through us you can go to the domain and click on the “Manage DNS” button, otherwise you can browse to your service and click the same button.
This will open a modal where you can manage your DNS records.
# What are your nameservers?
> For all of our .NET, Windows and GreenStack hosting the nameservers are listed in your UmbPanel account.
For all of our .NET, Windows and GreenStack hosting the nameservers are listed in your UmbPanel account.
The WPOne or UmbOne (Linux) nameservers are:
`ns1.stackdns.com`
`ns2.stackdns.com`
`ns3.stackdns.com`
`ns4.stackdns.com`
# What CAA records do you require?
> If you are using your own DNS service and wish to use our hosting as we use Cloudflare you will need to ensure the below CAA records have been added
If you are using your own DNS service and wish to use our hosting as we use Cloudflare you will need to ensure the below CAA records have been added:
| Certificate authority | CAA record content |
| --------------------- | ---------------------------------------- |
| Let’s Encrypt | `letsencrypt.org` |
| Google Trust Services | `pki.goog; cansignhttpexchanges=yes` |
| DigiCert | `digicert.com; cansignhttpexchanges=yes` |
| Sectigo | `sectigo.com` |
| SSL.com | ssl.com |
# What is a nameserver?
> A nameserver manages a directory of domains that match specific IP addresses, like a phonebook: with names and numbers. It is where the DNS server records
A nameserver manages a directory of domains that match specific IP addresses, like a phonebook: with names and numbers.
It is where the DNS server records for your domain (e.g. ‘umbhost.co.uk’) are stored. Whenever you type a domain name into a web browser, nameservers provide the IP address, which is a string of numbers. If nameservers were not in place, you would need to memorise that string of figures for every website you want to visit.
When you type ‘[www.examplewebsite.com](http://www.examplewebsite.com/)’ into a web browser, your browser uses DNS to look up the nameservers for [www.examplewebsite.com](http://www.examplewebsite.com/). The nameservers ns1.examplewebsite.com and ns2.examplewebsite.com are retrieved.
Your browser then uses the nameservers to look up the IP address for ‘[www.examplewebsite.com](http://www.examplewebsite.com/)’. Your browser will then receive an IP address which it will then send a request for. The web server hosting the website sends the requested page to the browser.
UmbHost nameservers are: dara.ns.cloudflare.com and phil.ns.cloudflare.com.
These nameservers make use of Cloudflare’s high-end DNS infrastructure, providing fully redundant and stable nameservers.
# What is your Nominet TAG?
> When you wish to transfer your Nominet domain name (.UK, .CO.UK, .ORG.UK, .ME.UK) you will need to change your domain to use our TAG, this is: UMBHOST
When you wish to transfer your Nominet domain name (.UK, .CO.UK, .ORG.UK, .ME.UK) you will need to change your domain to use our TAG, this is:
UMBHOST
# How do I configure Umbraco Forms to collect the users IP Address?
> As we use Cloudflare to protect our services the user's IP Address is sent in a different header, due to this you will need to update Umbraco Forms to use
As we use Cloudflare to protect our services the user’s IP Address is sent in a different header, due to this you will need to update Umbraco Forms to use a different header.
You can use the following Magic String:
\[@CF-Connecting-IP]
If you need to set this on a global level we recommend using the ASP.NET’s forwarded header middleware:
You can find a list of the headers used by Cloudflare here:
# How do I send email from my website?
> We have 2 options when it comes to SMTP. Basic SMTP Free with any hosting package 1 send only email address (no-reply@yourdomain.com) No email tracking No
We have 2 options when it comes to SMTP.
1. Basic SMTP
* Free with any hosting package
* 1 send only email address ()
* No email tracking
* No email deliverability logs
* No error logging
* Strict sending rules and limits
2. MailGun SMTP
* £5 per month for the first 1000 emails sent
* Additional £2 for each additional 1000 emails sent
* Send from any email address ()
* Email tracking
* Email deliverability logs
* Email interaction logs
* Email error logging
To add either option, open your service in [UmbPanel](https://www.umbpanel.io) and click **Upgrade to Add MailGun** or **Upgrade to Add SMTP**. This takes you to a new support ticket: submit it and we will set it up for you.
# How to use your domain with iCloud mail
> Apple has recently updated iCloud Mail to allow you to use custom domains, in this post I will show you how easy it is to setup your domain with the
Apple has recently updated iCloud Mail to allow you to use custom domains, in this post I will show you how easy it is to setup your domain with the service.
### First you will need to setup iCloud Mail on your devices
[Section titled “First you will need to setup iCloud Mail on your devices”](#first-you-will-need-to-setup-icloud-mail-on-your-devices)
To setup an iPhone, iPad or iPod go to **Settings** -> “**Your Name**” -> **iCloud** and then turn on **Mail**.
To setup a Mac select the Apple **menu** -> **System Preferences** and then one of the following:
macOS 10.15 or later: click **Apple ID** -> **iCloud** -> **Mail**
macOS 10.14 or earlier: click **iCloud** -> **Mail**
### Second you will need to setup iCloud Mail with your custom domain
[Section titled “Second you will need to setup iCloud Mail with your custom domain”](#second-you-will-need-to-setup-icloud-mail-with-your-custom-domain)
To be able to add a custom domain you will need to have an [iCloud+](https://support.apple.com/en-gb/HT201238) account.
Go to [icloud.com](https://www.icloud.com/)
Select [Account Settings](https://www.icloud.com/settings/)
Locate **Custom Email Domain** and select **Manage**
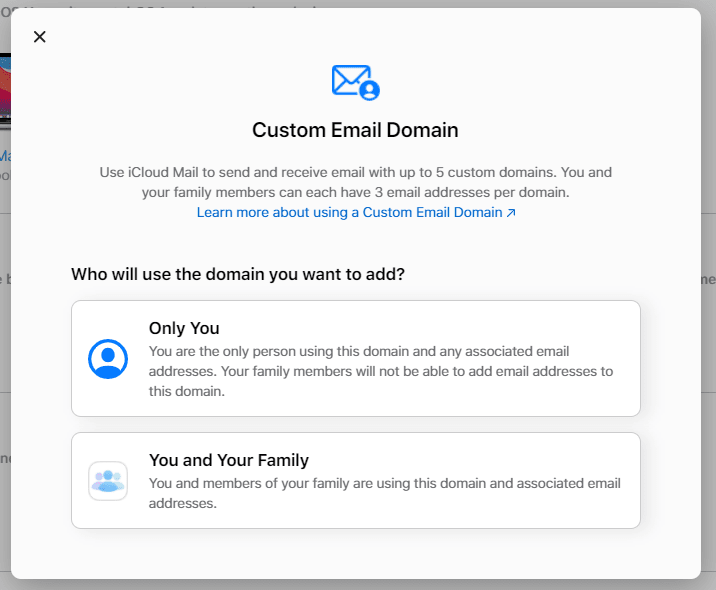
You will be prompted to confirm who will be using the domain you will be adding.
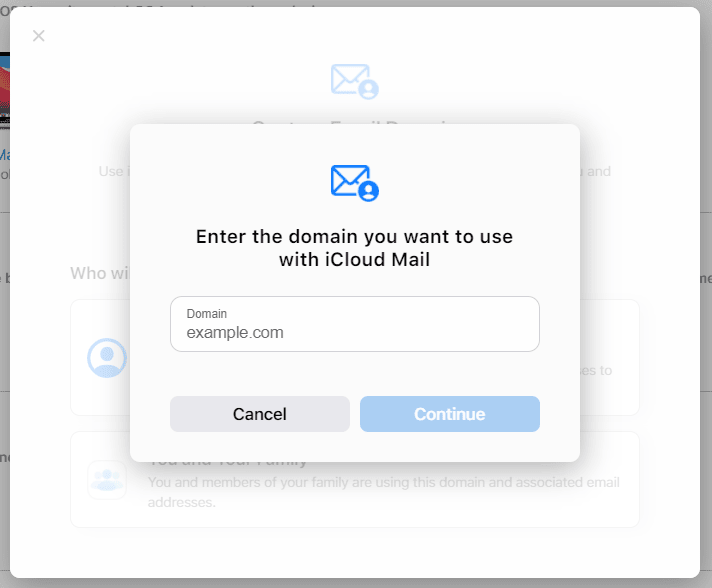
Next you will be asked to enter the domain name you wish to add, once entered click **Continue**.
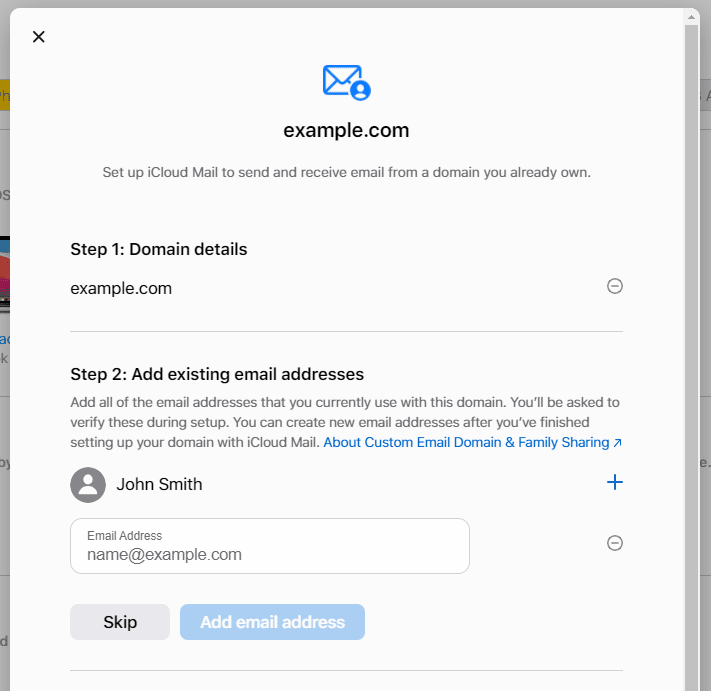
Now you can enter more email addresses or **Skip** onto the DNS setup.
The next step requires you to add or change the DNS records with your registrar or hosting provider, if your DNS is provided by us at UmbHost then this is easy, and below I will show you how to do that.
### Add the iCloud Mail DNS records to UmbHost
[Section titled “Add the iCloud Mail DNS records to UmbHost”](#add-the-icloud-mail-dns-records-to-umbhost)
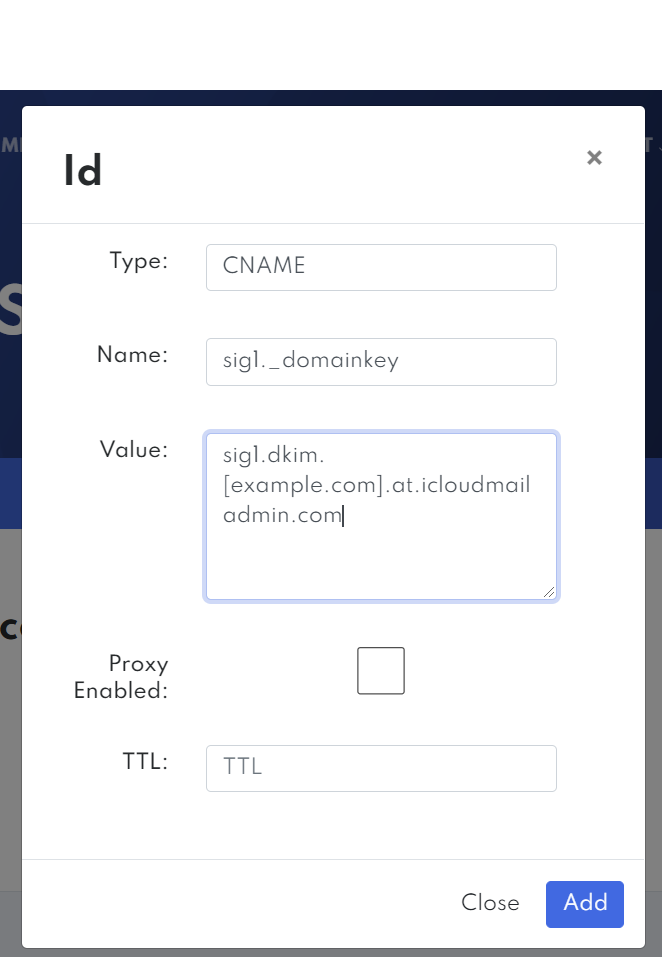
Sign in to [UmbPanel](https://www.umbpanel.io) and open your service (or, if you registered the domain with us, open it under **Domains**). Click **Manage DNS**, then use **Add DNS Record** to add the following DNS records:
**MX** Name: @ Value: mx01.mail.icloud.com Priority: 10
**MX** Name: @ Value: mx02.mail.icloud.com Priority: 10
**TXT** Name: @ Value: Paste in the record provided during setup
**TXT** Name: @ Value: v=spf1 redirect=icloud.com
**CNAME** Name: sig1.\_domainkey Value: sig1.dkim.\[example.com].at.icloudmailadmin.com Proxy Enabled: unchecked
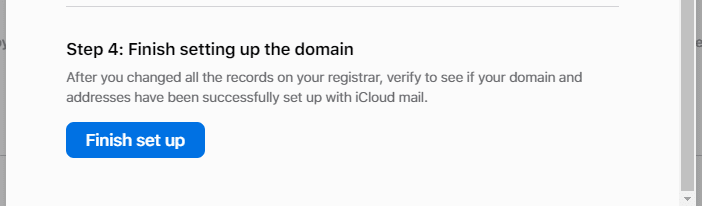
Back in iCloud click **Finish set up**
****
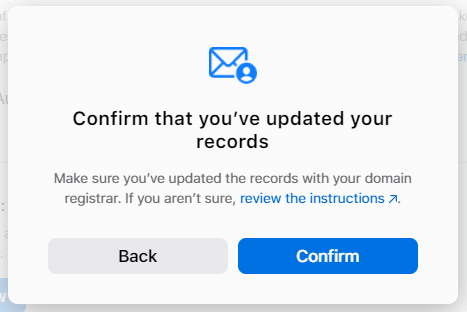
Then finally click **Confirm** and Apple will verify your DNS records.
# Sending Email Via MailGun SMTP
> To be able to send email via MailGun SMTP you read this knowledgebase article: Where do I find my MailGun information? Mailgun supports sending via SMTP
To be able to send email via MailGun SMTP you read this knowledgebase article: [Where do I find my MailGun information?](/email-smtp/where-do-i-find-my-mailgun-information/ "Where do I find my MailGun information?")
Mailgun supports sending via SMTP. The servers listen on ports `25`, `465`, `587`, and `2525`. Port 465 requires a TLS connection. Ports `25`, `587`, and `2525` require a non-TLS connection but may be upgraded to TLS using the `STARTTLS` command.
* Some ISPs are blocking or throttling SMTP port 25. We recommend using #587 instead.
* Google Compute Engine allows port `2525` for SMTP submission.
* SMTP send will error with “cannot parse to address” or “cannot parse from address” if the provided email address fails syntax checks in accordance with RFC5321, RFC5322, RFC6854.
Use “plain text” SMTP authentication and the credentials from the domain details page in your Control Panel which can be found by clicking on a domain in the Domains Tab. For enhanced security, use TLS encryption.
**Passing Sending Options**
When sending a message via SMTP you can pass additional sending options via custom MIME headers listed in the table below.
| Header | Description |
| --------------------------------------- | ------------------------------------------------------------------------------------------------------------------------------------------------------------------------------------------------------------------------------------------------------------------- |
| X-Mailgun-Tag | Tag string used for aggregating stats. See Tagging for more information. You can mark a message with several categories by setting multiple `X-Mailgun-Tag` headers. |
| X-Mailgun-Dkim | Enables/disables DKIM signatures on per-message basis. Use `yes` or `no`. |
| X-Mailgun-Deliver-By | Desired time of delivery. See Scheduling Delivery and Date Format. |
| X-Mailgun-Drop-Message | Enables sending in test mode. Pass `yes` if needed. See Sending in Test Mode. |
| X-Mailgun-Track | Toggles tracking on a per-message basis, see Tracking Messages for details. Pass `yes` or `no`. |
| X-Mailgun-Track-Clicks | Toggles clicks tracking on a per-message basis. Has higher priority than domain-level setting. Pass `yes`, `no` or `htmlonly`. |
| X-Mailgun-Track-Opens | Toggles opens tracking on a per-message basis. Has higher priority than domain-level setting. Pass `yes` or `no`. |
| X-Mailgun-Require-TLS | Use this header to control TLS connection settings. See TLS Sending Connection Settings |
| X-Mailgun-Skip-Verification | Use this header to control TLS connection settings. See TLS Sending Connection Settings |
| X-Mailgun-Recipient-Variables | Use this header to substitute recipient variables referenced in a batched mail message. See Batch Sending |
| X-Mailgun-Variables | Use this header to attach a custom JSON data to the message. See Attaching Data to Messages for more information. |
| X-Mailgun-Delivery-Time-Optimize-Period | Toggles STO on a per-message basis. String should be set to the number of hours in \[0- 9]+h format. See Sending a message with STO for details. |
| X-Mailgun-Time-Zone-Localize | Toggles TZO on a per-message basis. String should be set to preferred delivery time in HH:mm or hh:mmaa format, where HH:mm is used for 24 hour format without AM/PM and hh:mmaa is used for 12 hour format with AM/PM. See Sending a message with TZO for details. |
# What are your SMTP details?
> If you have added SMTP to your account then you will have been sent an email containing your SMTP credentials, there will be a record of this email saved
If you have added SMTP to your account then you will have been sent an email containing your SMTP credentials, there will be a record of this email saved to your account.
If you would like the email to be resent, please open a support ticket.
# Where do I find my MailGun information?
> When you are ready to start using MailGun, open your service in [UmbPanel](https://www.umbpanel.io) and click **Upgrade to Add MailGun** to ask us to enable it. The MailGun SMTP & DNS details can be found in
When you are ready to start using MailGun, open your service in [UmbPanel](https://www.umbpanel.io) and click **Upgrade to Add MailGun** to ask us to enable it.
Once enabled, open your service in UmbPanel and click **Manage MailGun Domains**. You will find your **SMTP Settings**, **Postboxes** (your SMTP logins) and the **DNS Validation Records** to add for your domain there.
Once you have your MailGun credentials, the following knowledgebase article explains [Sending Email Via MailGun SMTP](/email-smtp/sending-email-via-mailgun-smtp/)
# Why can't I send email with my MailGun details?
> Please make sure you have added all the required DNS records for your MailGun Domain, and that it has been validated. You will only be able to send emails
Please make sure you have added all the required DNS records for your MailGun Domain, and that it has been validated.
You will only be able to send emails once your domain is fully validated.
# Can I deploy from Azure DevOps
> Yes, this article in the Skrift Magazine shows you how: https://skrift.io/issues/how-to-deploy-to-ftp-web-deploy-using-azure-devops/
Yes, this article in the Skrift Magazine shows you how:
# How can I deploy from AppVeyor
> First you will need to download your Publishing Profile from within your SolidCP account. Head to SolidCP Click Hosting Space Menu on the left-hand side
First you will need to download your Publishing Profile from within your SolidCP account.
Log in to SolidCP: open your service in [UmbPanel](https://www.umbpanel.io), then under **Manage Website** click **Open Control Panel**.
Click **Hosting Space Menu** on the left-hand side of the control panel.
Click **Web Sites**
Click on the **Domain** for the website you wish to use
Click on the **Web Publishing**
If it’s not enabled you will need to enter a password and then click **Enable**
Finally click on **Download Publishing Profile for this website**, and then open the file using Notepad.
Using the settings found in this file enter them into your AppVeyor project as follows - Being sure to change **SITENAME** to the **msdeploySite** value:
**EU / UK Hosted Sites:**
Server (**publishUrl**): [https://webdeploy.umbhost.net:8172/msdeploy.axd?site=SITENAME](https://webdeploy.umbhost.net:8172/msdeploy.axd?site=SITENAMEWebsite)
**US Hosted Sites:**
Server (**publishUrl**): [https://webdeploy.us.umbhost.net:8172/msdeploy.axd?site=SITENAME](https://webdeploy.us.umbhost.net:8172/msdeploy.axd?site=SITENAMEWebsite)
Website Name (**msdeploySite**): SITENAME: Username (**userName**): Web Publishing Username Password (**userPWD**): Web Publishing Pasword.

If you are using YAML for your AppVeyor project, then you need to set it similar to below (Being sure to change the deploy name to your environment name):
HTML
```plaintext
version: 1.0.0-{build}
image: Visual Studio 2017
configuration: UAT
cache:
- packages -> **\packages.config
before_build: nuget restore
build:
publish_wap: true
deploy:
provider: Environment
name: ENVIRONMENTNAME
on:
branch: master
```
# How can I deploy from GitHub Actions
> Automatically deploy your projects to UmbHost.net with Web Deploy using this GitHub action. This action utilizes Microsoft’s own Web Deploy 3.0+
Automatically deploy your projects to UmbHost.net with Web Deploy using this GitHub action.
This action utilizes Microsoft’s own `Web Deploy 3.0+` executable, which you can read everything about [here](https://docs.microsoft.com/en-us/aspnet/web-forms/overview/deployment/web-deployment-in-the-enterprise/deploying-web-packages). Further documentation of the rules and parameters can also be seen [here](https://docs.microsoft.com/en-us/previous-versions/windows/it-pro/windows-server-2008-r2-and-2008/dd568992\(v=ws.10\)).
### [](https://github.com/marketplace/actions/umbhost-web-deploy#example)Example
[Section titled “Example”](#example)
Place the following in your action `/.github/workflows/main.yml`
```yaml
- name: Deploy to UmbHost
uses: UmbHost/umbhost-web-deploy-composite-action@1.0.0
with:
website-name: ${{ secrets.WEBSITE_NAME }}
server-computer-name: ${{ secrets.SERVER_COMPUTER_NAME }}
server-username: ${{ secrets.USERNAME }}
server-password: ${{ secrets.PASSWORD }}
source-path: '_build'
source-paramFile: 'Umbraco.Web.SetParameters.xml'
```
### [](https://github.com/marketplace/actions/umbhost-web-deploy#requirements)Requirements
[Section titled “Requirements”](#requirements)
* Access to the SolidCP account for the hosting package, to download the WebDeploy publishing profile.
### [](https://github.com/marketplace/actions/umbhost-web-deploy#setup)Setup
[Section titled “Setup”](#setup)
1. Locate the repository you want to automate UmbHost web deployment in.
2. Select the `Actions` tab.
3. Select `Set up a workflow yourself`.
4. Copy paste one of the examples into your .yml workflow file and commit the file.
5. All the examples takes advantage of `Secrets`, so make sure you have added the required secrets to your repository. Instructions on this can be found in the [settings](https://github.com/marketplace/actions/umbhost-web-deploy#settings) section.
6. Once you have added your secrets, your new workflow should be running on every push to the branch.
### [](https://github.com/marketplace/actions/umbhost-web-deploy#settings)Settings
[Section titled “Settings”](#settings)
These settings can be either be added directly to your .yml config file or referenced from your GitHub repository `Secrets`. I strongly recommend storing any private values like `server-username` and `server-password` in `Secrets`, regardless of if the repository is private or not.
To add a secret to your repository go to the `Settings` tab, followed by `Secrets`. Here you can add your secrets and reference to them in your .yml file.
You can find the access credentials for WebDeploy by opening SolidCP from your service in [UmbPanel](https://www.umbpanel.io) (**Manage Website** → **Open Control Panel**) -> `Web Sites` -> `WEBSITENAME` -> `Web Publishing` -> if you have previously set a password click `Download Publishing Profile for this web site` and open the downloaded file with Notepad, if you have not previously set a password or you cannot see the `Download Publishing Profile for this web site` button, enter a `Password` and `Confirmation password` and then click `Enable`, and then you will be able to click the `Download Publishing Profile for this web site` button
| Setting | Required | Example | Default Value | Description |
| ---------------------- | -------- | ------------------------------------------------------------------------------- | ----------------- | ------------------------------------------ |
| `website-name` | Yes | `example.com` | | Website name as found in SolidCP |
| `server-computer-name` | Yes | `https://webdeploy.umbhost.net:8172` or `https://webdeploy.us.umbhost.net:8172` | | Computer name, including the port |
| `server-username` | Yes | `username` | | Your UmbHost Web Publishing username |
| `server-password` | Yes | `password` | | Your UmbHost Web Publishing password |
| `source-fileName` | Yes | `Umbraco.Web.zip` | `Umbraco.Web.zip` | The location of the SetParameters.xml file |
| `source-path` | No | `_build` | `_build` | The source directory for payload |
| `source-paramFile` | No | `_build` | | The location of the SetParameters.xml file |
#### [](https://github.com/marketplace/actions/umbhost-web-deploy#build-and-publish-net-core-api)Build and publish Umbraco V8
[Section titled “Build and publish Umbraco V8”](#build-and-publish-umbraco-v8)
```yaml
name: Build, publish and deploy project to UmbHost
on:
push:
branches: [ main ]
env:
SolutionName: ${{ secrets.SOLUTION_NAME }}
BuildPlatform: Any CPU
BuildConfiguration: Release
jobs:
build:
runs-on: self-hosted
steps:
- name: Checkout
uses: actions/checkout@v3.0.0
- name: Setup MSBuild
uses: microsoft/setup-msbuild@v1
- name: Setup NuGet
uses: NuGet/setup-nuget@v1.0.5
with:
nuget-version: 5.5.0
- name: Create Build Directory
run: mkdir _build
- name: Restore Packages
run: nuget restore ${{env.SolutionName}}
- name: Build Solution
run: |
msbuild.exe ${{env.SolutionName}} /nologo /nr:false /p:DeployOnBuild=true /p:DeployDefaultTarget=WebPublish /p:WebPublishMethod=Package /p:PackageAsSingleFile=true /p:DeleteExistingFiles=True /p:SkipInvalidConfigurations=true /p:IncludeSetAclProviderOnDestination=False /p:AutoParameterizationWebConfigConnectionStrings=False /p:platform="${{env.BuildPlatform}}" /p:configuration="${{env.BuildConfiguration}}" /p:PackageLocation="../_build"
- name: Deploy to UmbHost
uses: UmbHost/umbhost-web-deploy-composite-action@1.0.0
with:
website-name: ${{ secrets.WEBSITE_NAME }}
server-computer-name: ${{ secrets.SERVER_COMPUTER_NAME }}
server-username: ${{ secrets.USERNAME }}
server-password: ${{ secrets.PASSWORD }}
source-path: '_build'
source-paramFile: 'Umbraco.Web.SetParameters.xml'
```
# How can I stop Web Deploy resetting my folder permissions?
> If you are deploying from Visual Studio you will need to alter your project file to prevent Web Deploy changing the permissions. To accomplish this
If you are deploying from Visual Studio you will need to alter your project file to prevent Web Deploy changing the permissions.
To accomplish this, simply navigate to your project and find the file with the extension .csproj
Find the section which looks similar to as follows:
HTML
```plaintext
```
Then include this element:
HTML
```plaintext
False
```
If you placed your **** within the **‘Release|AnyCPU’** section but built your project within the Debug configuration, then the **** attribute may not invoke on the production server. To make sure your permission is not altered create the **** attribute on both the **‘Release|AnyCPU’** and **‘Debug|AnyCPU’** group of your project file.
If you are deploying from Azure DevOps, then include the following within the **MSBuild Arguements**:
HTML
```plaintext
/p:IncludeSetAclProviderOnDestination=False
```
# How do I connect via FTP?
> Connecting via FTP to your web hosting is quick and easy. Ensure you have an FTP client available. We'd recommend FileZilla. UmbOne package instructions
Connecting via FTP to your web hosting is quick and easy.
Ensure you have an FTP client available. We’d recommend [**FileZilla**](https://filezilla-project.org/download.php)**.**
**UmbOne package instructions:**
Log in to SolidCP: open your service in [UmbPanel](https://www.umbpanel.io), then under **Manage Website** click **Open Control Panel**.
Click **Hosting Space Menu** on the left-hand side of the control panel.
Then click **FTP Accounts**
Next click **Create FTP Account** on the right-hand side of the control panel, then fill out the form with your details as required and click **Update**.
In FileZilla enter the server name found below and the details created earlier, then select Quickconnect.
Depending on the server location your ftp hostname will be one of the following:
\*\*Windows UK Hosted Websites: \*\*ftp.gb.umbhost.net
**Windows EU Hosted Websites:** ftp.umbhost.net
**Windows EU2 Hosted Websites:** ftp.eu2.umbhost.net
**US Hosted Websites:** ftp.us.umbhost.net
# How do I connect via Web Deploy?
> Connecting via Web Deploy to your web hosting is quick and easy. Head to SolidCP Click Hosting Space Menu on the left-hand side of the control panel. Then
Connecting via Web Deploy to your web hosting is quick and easy.
Log in to SolidCP: open your service in [UmbPanel](https://www.umbpanel.io), then under **Manage Website** click **Open Control Panel**.
Click **Hosting Space Menu** on the left-hand side of the control panel.
Then click **Web Sites**
Find the website you would like to use Web Deploy with and click on the name.
Next click **Web Publishing** on the tabs found in the centre of the control panel, enter a password you would like to use, and then click **Enable**
Finally click **Download Publishing Profile for this website**
If you would like to view the settings, open the publishing profile in a program such as Notepad.
Our Web Deploy server hostnames are:
\*\*Windows EU1: \*\*webdeploy.umbhost.net
\*\*Windows EU2: \*\*webdeploy.eu2.umbhost.net
\*\*Windows UK: \*\*webdeploy.gb.umbhost.net
\*\*Windows US: \*\*webdeploy.us.umbhost.net
Please note that sometimes the import into Visual Studio will include an empty configuration, if this happens click on the **More actions** dropdown and then **Delete** when viewing the configuration with no options.
# I use Azure DevOps, can you install the deployment agent?
> We cannot install the deployment agent on any of our shared hosting. We can install the deployment agent on any of our VPS or UmbDedicated packages.
We cannot install the deployment agent on any of our shared hosting.
We can install the deployment agent on any of our VPS or UmbDedicated packages.
# What is the passive FTP port range?
> Our passive FTP port range is: 49152 - 65534
Our passive FTP port range is: 49152 - 65534
# What is the Web Deploy configuration?
> The destination, auth type, username, password and additional arguments to configure your application for Web Deploy.
Use the settings below to configure your application for Web Deploy.
Be sure to replace YOURSITENAME
**Destination Computer**
**For EU / UK Hosted Sites:**
```text
https://webdeploy.umbhost.net:8172/msdeploy.axd?site=YOURSITENAME
```
**For US Hosted Sites:**
```text
https://webdeploy.us.umbhost.net:8172/msdeploy.axd?site=YOURSITENAME
```
**AuthType**
```text
Basic
```
**Username** As found in SolidCP, which you can open from your service in [UmbPanel](https://www.umbpanel.io) (**Manage Website** → **Open Control Panel**)
**Password** As set whilst enabling Web Deploy in SolidCP
**Additional Arguments**
```text
-setParam:'IIS Web Application Name'='YOURSITENAME' -enableRule:AppOffline -enableRule:DoNotDeleteRule -setParamFile:"YOURSITENAME.Web.SetParameters.xml"
```
# Are there delays when deploying to a replicated GreenStack service?
> Yes, the system will wait 5 minutes between deploying to servers, this is to ensure that your website is running and stable before it moves on to deploy
Yes, the system will wait 5 minutes between deploying to servers, this is to ensure that your website is running and stable before it moves on to deploy to the next server.
If you need this extended or shortened, please contact support.
# Can I automatically trigger my GreenStack deployment?
> Yes, using the Webhook you can trigger a deployment after your CI/CD build has completed successfully. Below is an example task you can add to your GitHub
Yes, using the [Webhook](/greenstack/is-there-a-webhook-to-automatically-trigger-the-release/) you can trigger a deployment after your CI/CD build has completed successfully.
Below is an example task you can add to your GitHub Actions file:
```plaintext
- name: Trigger webhook
run: curl -fS -X POST ${{secrets.WEBHOOK_ENDPOINT}}
```
# Can I have terminal access to my GreenStack container?
> Yes. Click Open Terminal under Running Tasks on Manage Websites in UmbPanel. The terminal is for debugging only: changes don't persist.
Yes. Open your service in [UmbPanel](https://www.umbpanel.io), click **Manage Websites**, then click **Open Terminal** next to your container under **Running Tasks**.
The terminal is for debugging only. Your container is replaced on every deployment, so any changes you make outside the persistent folders (`wwwroot/media`, `umbraco/Logs` and `keys`) are lost. To change your site, update your repository and redeploy.
The container image is minimal, so common tools such as `curl`, `ps` and text editors aren’t available.
# Getting Started with Umbraco 13 on GreenStack with GitHub
> Step-by-step guide to deploying Umbraco 13 to GreenStack with GitHub Actions: start from a template or starter kit, or add GreenStack support to an existing project.
This guide takes you from nothing (or an existing Umbraco 13 project) to a site running on GreenStack, deployed automatically from GitHub every time you push.
**If you’d rather not do this yourself,** [**get in touch**](https://umbhost.net/gb/contact-us) **and we can handle the whole setup for you.**
## The steps at a glance
[Section titled “The steps at a glance”](#the-steps-at-a-glance)
1. [Choose a starting point](#step-1-choose-a-starting-point): a ready-made template or starter kit, or your existing project.
2. [Configure an existing project](#step-2-configure-an-existing-project): only needed if you didn’t start from a template.
3. [Add the GitHub Actions workflow](#step-3-add-the-github-actions-workflow) and push your code.
4. [Connect your registry and image in UmbPanel](#step-4-connect-your-registry-and-image-in-umbpanel).
5. [Add the deploy webhook](#step-5-add-the-deploy-webhook) so every push deploys automatically.
6. [Check your site](#step-6-check-your-site).
## What you’ll need
[Section titled “What you’ll need”](#what-youll-need)
* A [GreenStack hosting service](https://umbhost.net/gb/sustainable-cloud-hosting/modern-umbraco-hosting) and access to [UmbPanel](https://www.umbpanel.io)
* A GitHub account and a repository for your site
* The [.NET 8 SDK](https://dotnet.microsoft.com/download/dotnet/8.0) and Git installed locally
* Optional: [Docker Desktop](https://www.docker.com/products/docker-desktop/), to test your image locally before pushing
## How GreenStack runs your site
[Section titled “How GreenStack runs your site”](#how-greenstack-runs-your-site)
GreenStack runs your site as a Docker container on [Docker Swarm](https://docs.docker.com/engine/swarm/), behind a [Traefik](https://traefik.io/traefik) reverse proxy and [Cloudflare](https://www.cloudflare.com). HTTPS is handled before traffic reaches your container, which receives plain HTTP on port `8080`. This is the setup [Umbraco recommends for Docker](https://docs.umbraco.com/umbraco-cms/fundamentals/setup/server-setup/running-umbraco-in-docker#https).
GreenStack configures a lot for you. **Don’t set any of these in your own `appsettings` files or Dockerfile**: GreenStack sets them as environment variables, and yours would conflict.
| Setting | What GreenStack does |
| ---------------------------------------------------------------------------------------- | ---------------------------------------------------------------------------- |
| `ConnectionStrings:umbracoDbDSN` | Points at the database provisioned for your service |
| `ASPNETCORE_ENVIRONMENT` | Set per environment, e.g. `Production` or `Staging` |
| `Umbraco:CMS:WebRouting:UmbracoApplicationUrl` and `Umbraco:CMS:Security:BackOfficeHost` | Set to your `*.umbpanel.io` preview URL |
| `Umbraco:CMS:Global:MainDomLock` | `SqlMainDomLock`, which is safe across multiple replicas |
| `Umbraco:CMS:Examine:LuceneDirectoryFactory` | `TempFileSystemDirectoryFactory`, so each replica keeps its own search index |
GreenStack also provides persistent storage for `wwwroot/media`, `umbraco/Logs`, `umbraco/Data` and `/app/keys`. Everything else in the container comes from your Docker image and is replaced on every deployment.
***
## Step 1: Choose a starting point
[Section titled “Step 1: Choose a starting point”](#step-1-choose-a-starting-point)
### Option A: start from a template or starter kit (recommended)
[Section titled “Option A: start from a template or starter kit (recommended)”](#option-a-start-from-a-template-or-starter-kit-recommended)
We publish ready-made Umbraco 13 projects with every GreenStack setting from Step 2 already in place, including the `Dockerfile` and `.dockerignore`. Pick the one closest to what you’re building:
| Starting point | What you get | GitHub template |
| --------------------- | --------------------------------------------------------------------------------------------------------------------------- | ----------------------------------------------------------------------------------------------------------- |
| **Blank** | A clean Umbraco 13 install | [GreenStack.Umbraco-v13](https://github.com/UmbHost/GreenStack.Umbraco-v13) |
| **Clean Starter Kit** | A complete blog-style site using the [Clean](https://marketplace.umbraco.com/package/clean) starter kit | [GreenStack.Umbraco.CleanStarterKit-v13](https://github.com/UmbHost/GreenStack.Umbraco.CleanStarterKit-v13) |
| **The Starter Kit** | Umbraco’s official [The Starter Kit](https://marketplace.umbraco.com/package/umbraco.thestarterkit) sample site | [GreenStack.Umbraco.TheStarterKit-v13](https://github.com/UmbHost/GreenStack.Umbraco.TheStarterKit-v13) |
| **UmBootstrap** | A Bootstrap-based site using [UmBootstrap](https://marketplace.umbraco.com/package/umbraco.community.templates.umbootstrap) | [GreenStack.Umbraco.UmBootstrap-v13](https://github.com/UmbHost/GreenStack.Umbraco.UmBootstrap-v13) |
There are two ways to use them.
**From GitHub:** open the template repository, click **Use this template** → **Create a new repository**, then clone your new repository.
**With `dotnet new`:** install the template and create a project. For example, for the Clean Starter Kit:
```bash
dotnet new install UmbHost.GreenStack.Umbraco.CleanStarterKit::13.*
dotnet new greenstack-umbraco-cleanstarterkit -n MyProject
```
`dotnet new` names the project after `-n`, and the `Dockerfile` is updated to match. Swap in the package and template name for the starting point you chose:
| Starting point | Package | Template name |
| ----------------- | -------------------------------------------- | ------------------------------------ |
| Blank | `UmbHost.GreenStack.Umbraco` | `greenstack-umbraco` |
| Clean Starter Kit | `UmbHost.GreenStack.Umbraco.CleanStarterKit` | `greenstack-umbraco-cleanstarterkit` |
| The Starter Kit | `UmbHost.GreenStack.Umbraco.TheStarterKit` | `greenstack-umbraco-thestarterkit` |
| UmBootstrap | `UmbHost.GreenStack.Umbraco.UmBootstrap` | `greenstack-umbraco-umbootstrap` |
> **Important:** Keep the `::13.*` on the end of the package name. Without it, `dotnet new install` installs the newest version, which creates an Umbraco 17 project.
Then create an empty repository on GitHub and push the project to it:
```bash
cd MyProject
git init -b main
git add .
git commit -m "Initial commit"
git remote add origin https://github.com/YOUR_ACCOUNT/YOUR_REPOSITORY.git
git push -u origin main
```
Your project is now configured for GreenStack. **Skip to [Step 3](#step-3-add-the-github-actions-workflow).**
### Option B: use your existing Umbraco 13 project
[Section titled “Option B: use your existing Umbraco 13 project”](#option-b-use-your-existing-umbraco-13-project)
Work through [Step 2](#step-2-configure-an-existing-project) to add the GreenStack configuration. Every snippet below is taken from the [blank template](https://github.com/UmbHost/GreenStack.Umbraco-v13), so you can compare against a working project at any time.
***
## Step 2: Configure an existing project
[Section titled “Step 2: Configure an existing project”](#step-2-configure-an-existing-project)
> **Starting from a template?** Skip this step: it’s already done for you.
> **Shortcut:** the [UmbHost GreenStack NuGet package](/greenstack/what-does-the-umbhost-greenstack-nuget-package-do/) does most of this step for you. Install it with `dotnet add package UmbHost.GreenStack.Umbraco.Configuration` and you can skip [2.1](#21-trust-the-proxys-forwarded-headers-programcs) to [2.4](#24-persist-data-protection-keys) and the Razor and Umbraco Forms parts of [2.6](#26-check-your-csproj). You still need 2.5, publishing `App_Plugins` in 2.6, 2.7, 2.8 and 2.9.
### 2.1 Trust the proxy’s forwarded headers (`Program.cs`)
[Section titled “2.1 Trust the proxy’s forwarded headers (Program.cs)”](#21-trust-the-proxys-forwarded-headers-programcs)
Your container only ever sees plain HTTP from the proxy. Without this change, Umbraco thinks every request is insecure, which breaks back office login, URL generation and security features.
Update `Program.cs` to configure and use the forwarded headers middleware. `app.UseForwardedHeaders()` must come before `app.UseUmbraco()`:
```csharp
using Microsoft.AspNetCore.HttpOverrides;
WebApplicationBuilder builder = WebApplication.CreateBuilder(args);
builder.Services.Configure(options =>
{
options.ForwardedHeaders = ForwardedHeaders.XForwardedFor | ForwardedHeaders.XForwardedProto;
options.KnownNetworks.Clear();
options.KnownProxies.Clear();
});
builder.CreateUmbracoBuilder()
.AddBackOffice()
.AddWebsite()
.AddDeliveryApi()
.AddComposers()
.Build();
WebApplication app = builder.Build();
await app.BootUmbracoAsync();
// Must come before UseUmbraco()
app.UseForwardedHeaders();
app.UseUmbraco()
.WithMiddleware(u =>
{
u.UseBackOffice();
u.UseWebsite();
})
.WithEndpoints(u =>
{
u.UseInstallerEndpoints();
u.UseBackOfficeEndpoints();
u.UseWebsiteEndpoints();
});
await app.RunAsync();
```
Keep any other `.Add...()` calls and middleware your project already has. Only the `ForwardedHeadersOptions` block and `app.UseForwardedHeaders()` are new.
**Using `Startup.cs`?** Projects upgraded from older Umbraco versions may still use a `Startup.cs` file. Make the same two changes there:
```csharp
using Microsoft.AspNetCore.HttpOverrides;
public void ConfigureServices(IServiceCollection services)
{
services.Configure(options =>
{
options.ForwardedHeaders = ForwardedHeaders.XForwardedFor | ForwardedHeaders.XForwardedProto;
options.KnownNetworks.Clear();
options.KnownProxies.Clear();
});
// ... your existing services.AddUmbraco(...) code
}
public void Configure(IApplicationBuilder app, IWebHostEnvironment env)
{
// Must come before UseUmbraco()
app.UseForwardedHeaders();
// ... your existing app.UseUmbraco() code
}
```
See [How to forward HTTPS headers](/greenstack/how-to-forward-https-headers/) for more detail.
### 2.2 Disable the HTTPS health check (`appsettings.json`)
[Section titled “2.2 Disable the HTTPS health check (appsettings.json)”](#22-disable-the-https-health-check-appsettingsjson)
Umbraco’s HTTPS health check fails behind a proxy, which blocks back office access. Disable it by ID inside your existing `Umbraco` → `CMS` section, and stop runtime minification from forcing HTTPS:
```json
{
"Umbraco": {
"CMS": {
"HealthChecks": {
"DisabledChecks": [
{
"Id": "E2048C48-21C5-4BE1-A80B-8062162DF124"
}
]
},
"RuntimeMinification": {
"UseHttps": false
}
}
}
}
```
> **Note:** The check ID is different in each Umbraco version. `E2048C48-21C5-4BE1-A80B-8062162DF124` is the ID for Umbraco 13.
See [How do I fix the HTTPS health check for GreenStack?](/greenstack/how-do-i-fix-the-https-health-check-for-greenstack/) for more detail.
### 2.3 Remove the HTTPS runtime validator
[Section titled “2.3 Remove the HTTPS runtime validator”](#23-remove-the-https-runtime-validator)
In Production runtime mode, Umbraco refuses to start unless HTTPS is configured in the application. GreenStack handles HTTPS before your container, so remove that validator. Create `Composers/DockerChecksRemoverComposer.cs`:
```csharp
using Umbraco.Cms.Core.Composing;
using Umbraco.Cms.Core.DependencyInjection;
using Umbraco.Cms.Infrastructure.Runtime.RuntimeModeValidators;
namespace MyProject.Composers;
public class DockerChecksRemoverComposer : IComposer
{
public void Compose(IUmbracoBuilder builder)
{
builder.RuntimeModeValidators()
.Remove();
}
}
```
Change the `namespace` to match your project. Composers run automatically at startup, so nothing else needs registering.
### 2.4 Persist Data Protection keys
[Section titled “2.4 Persist Data Protection keys”](#24-persist-data-protection-keys)
.NET uses Data Protection keys to encrypt login cookies and antiforgery tokens. Your container is replaced on every deployment, so the keys must be stored on GreenStack’s persistent `/app/keys` folder, or every deployment will log everyone out. Create `Composers/DataProtectionComposer.cs`:
```csharp
using Microsoft.AspNetCore.DataProtection;
using Microsoft.Extensions.DependencyInjection;
using Microsoft.Extensions.Hosting;
using Umbraco.Cms.Core.Composing;
using Umbraco.Cms.Core.DependencyInjection;
namespace MyProject.Composers;
public class DataProtectionComposer : IComposer
{
public void Compose(IUmbracoBuilder builder)
{
var environment = builder.Services.BuildServiceProvider()
.GetRequiredService();
var keysPath = (environment.IsProduction() || environment.IsStaging())
? "/app/keys"
: Path.Combine(environment.ContentRootPath, "DataProtection-Keys");
if (!Directory.Exists(keysPath))
{
Directory.CreateDirectory(keysPath);
}
builder.Services.AddDataProtection()
.PersistKeysToFileSystem(new DirectoryInfo(keysPath));
}
}
```
> **Important:** Keep both `IsProduction()` and `IsStaging()`. A staging environment on GreenStack also has the `/app/keys` folder, and leaving it out breaks logins there.
See [How to persist .NET Data Protection keys](/greenstack/how-to-persist-net-data-protection-keys/) for more detail.
### 2.5 Run in Production mode (`appsettings.Production.json`)
[Section titled “2.5 Run in Production mode (appsettings.Production.json)”](#25-run-in-production-mode-appsettingsproductionjson)
GreenStack sets `ASPNETCORE_ENVIRONMENT` to `Production`, so `appsettings.Production.json` is applied on top of `appsettings.json`. Use it to put Umbraco into [Production runtime mode](https://docs.umbraco.com/umbraco-cms/13.latest/fundamentals/setup/server-setup/runtime-modes), which is faster and locks down settings that shouldn’t change on a live site:
```json
{
"$schema": "appsettings-schema.json",
"Serilog": {
"MinimumLevel": {
"Default": "Error"
}
},
"Umbraco": {
"CMS": {
"Runtime": {
"Mode": "Production"
},
"Hosting": {
"Debug": false
},
"ModelsBuilder": {
"ModelsMode": "Nothing"
},
"RuntimeMinification": {
"CacheBuster": "Version"
},
"Content": {
"MacroErrors": "Inline"
}
}
}
}
```
Production runtime mode has some requirements of its own:
* **Views must be precompiled.** Remove `false` and `false` from your `.csproj` if they’re there. Otherwise every page returns **404 Page not found**.
* **Models must be compiled into your project.** `"ModelsMode": "Nothing"` (not `None`) means models aren’t generated on the live site. Make document type changes locally or in a development environment, then rebuild and redeploy.
* **A fixed cache buster is required.** Umbraco 13 won’t start in Production mode unless `RuntimeMinification:CacheBuster` is `Version`, as in the file above.
> **Note:** Don’t add `UmbracoApplicationUrl`, `MainDomLock`, the Examine directory factory, a connection string or `UseHttps` here. GreenStack provides the first four, and HTTPS is handled by the proxy.
### 2.6 Check your `.csproj`
[Section titled “2.6 Check your .csproj”](#26-check-your-csproj)
Make sure the Razor files the back office needs are published:
```xml
true
```
If you use **Umbraco Forms**, its theme views aren’t included when views are precompiled, so copy them to the output. If you have **`App_Plugins`** extensions (custom dashboards and property editors), make sure they’re published too:
```xml
```
### 2.7 Add a `Dockerfile` and `.dockerignore`
[Section titled “2.7 Add a Dockerfile and .dockerignore”](#27-add-a-dockerfile-and-dockerignore)
Create a file named `Dockerfile` (no extension) in the **root of your repository**:
```dockerfile
FROM mcr.microsoft.com/dotnet/aspnet:8.0 AS base
WORKDIR /app
EXPOSE 8080
FROM mcr.microsoft.com/dotnet/sdk:8.0 AS build
ARG BUILD_CONFIGURATION=Release
WORKDIR /src
COPY . ./
RUN dotnet restore "MyProject/MyProject.csproj" --locked-mode
RUN dotnet build "MyProject/MyProject.csproj" -c $BUILD_CONFIGURATION --no-restore
FROM build AS publish
RUN dotnet publish "MyProject/MyProject.csproj" -c $BUILD_CONFIGURATION -o /app/publish /p:UseAppHost=false --no-build
FROM base AS final
WORKDIR /app
COPY --chown=1000:1000 --from=publish /app/publish .
RUN mkdir -p keys umbraco/Logs umbraco/Data wwwroot/media \
&& chown -R 1000:1000 keys umbraco wwwroot
USER 1000:1000
ENTRYPOINT ["dotnet", "MyProject.dll", "--console-logger-format=json"]
```
Replace the placeholders with your own project’s names:
| Placeholder | Replace with | Example |
| --------------------------------------- | ----------------------------------------------------------------- | ------------------------------ |
| `MyProject/MyProject.csproj` (3 places) | The path from the repository root to your web project’s `.csproj` | `src/Acme.Web/Acme.Web.csproj` |
| `MyProject.dll` | Your web project’s assembly name, usually the `.csproj` name | `Acme.Web.dll` |
> **Important:** Paths are case-sensitive on Linux. `src/acme.web/Acme.Web.csproj` won’t match `src/Acme.Web/Acme.Web.csproj`.
Keep the `1000:1000` user, port `8080` and the `mkdir` line: GreenStack relies on them. Don’t add `ASPNETCORE_ENVIRONMENT`, `ASPNETCORE_URLS` or connection strings to the Dockerfile.
Next, create `.dockerignore` in the root of your repository. It keeps build output, local data and secrets out of your image:
```text
# Git
.git
.gitignore
.gitattributes
*/.github
# Build outputs
**/bin/
**/obj/
**/out/
**/publish/
# Visual Studio / Rider
.vs/
.vscode/
.idea/
*.suo
*.user
*.userosscache
*.sln.docstates
*.userprefs
.idea/
# NuGet
*.nupkg
*.snupkg
packages/
.nuget/
# Test results
[Tt]est[Rr]esult*/
[Bb]uild[Ll]og.*
*.trx
*.coverage
# Umbraco specific
**/App_Data/
**/umbraco/Data/
**/umbraco/Logs/
**/wwwroot/media/
umbraco.config
# Node modules (if you have front-end build)
**/node_modules/
**/npm-debug.log
**/yarn-error.log
# OS files
.DS_Store
Thumbs.db
*.swp
*.swo
*~
# Docker
Dockerfile
.dockerignore
docker-compose*.yml
*.md
# CI/CD
.github/
.gitlab-ci.yml
azure-pipelines.yml
# Logs
*.log
logs/
# Environment files
.env
.env.*
!.env.example
```
The latest versions of both files are in our [GreenStack CI/CD samples](https://github.com/UmbHost/GreenStack.CICD.Samples) repository. See also [GreenStack starter Dockerfile](/greenstack/greenstack-starter-dockerfile/).
### 2.8 Exclude UmbPanel addresses from `www` redirects
[Section titled “2.8 Exclude UmbPanel addresses from www redirects”](#28-exclude-umbpanel-addresses-from-www-redirects)
Skip this if your site doesn’t redirect between `www` and non-`www`.
GreenStack checks your site’s health, and serves its preview, through its `*.umbpanel.io` address. If a redirect sends those requests to your own domain, the health check fails and your container is taken out of service, so **never redirect `*.umbpanel.io`**. Your site runs on Kestrel, not IIS, so there’s no `web.config`; add the redirect in `Program.cs` instead, listing **only your production domain**:
```csharp
using Microsoft.AspNetCore.Rewrite;
// Redirect www.example.com to example.com. UmbPanel addresses aren't listed,
// so the preview URL and health checks keep working.
var rewriteOptions = new RewriteOptions()
.AddRedirectToNonWwwPermanent("www.example.com");
app.UseRewriter(rewriteOptions);
```
For the opposite direction, use `AddRedirectToWwwPermanent("example.com")`. To use IIS-style `iisrewrite.xml` rules instead, see [How do I exclude UmbPanel domains from www redirects?](/greenstack/how-do-i-exclude-umbpanel-domains-from-www-redirects/).
### 2.9 Check that it builds
[Section titled “2.9 Check that it builds”](#29-check-that-it-builds)
Build in Release mode before you push. Production mode precompiles your views, so view errors (a missing model, a bad `@inherits`, a package that doesn’t support .NET 8) show up here rather than as 404s on your live site:
```bash
dotnet build -c Release
```
If you have Docker installed, build the image too. It’s the same build GreenStack’s workflow will run:
```bash
docker build -t my-site .
```
Commit your changes and push them to GitHub.
***
## Step 3: Add the GitHub Actions workflow
[Section titled “Step 3: Add the GitHub Actions workflow”](#step-3-add-the-github-actions-workflow)
The workflow builds your Docker image, pushes it to the GitHub Container Registry (GHCR), then tells GreenStack to deploy it.
Create `.github/workflows/main.yml` in your repository:
```yaml
name: Build and Push Docker Image
on:
push:
branches: [main]
workflow_dispatch:
env:
REGISTRY: ghcr.io
IMAGE_NAME: GITHUB_ACCOUNT_NAME/DOCKER_IMAGE_NAME
jobs:
build:
runs-on: ubuntu-latest
permissions:
contents: read
packages: write
steps:
- uses: actions/checkout@v5
with:
submodules: 'true'
- name: Log in to GHCR
uses: docker/login-action@v3
with:
registry: ghcr.io
username: ${{ github.actor }}
password: ${{ secrets.GITHUB_TOKEN }}
- name: Generate timestamp
id: timestamp
run: echo "tag=$(date +'%H%M%S%d%m%Y')" >> $GITHUB_OUTPUT
- name: Build and push
working-directory: ./
run: |
docker build -t ${{ env.REGISTRY }}/${{ env.IMAGE_NAME }}:${{ steps.timestamp.outputs.tag }} .
docker tag ${{ env.REGISTRY }}/${{ env.IMAGE_NAME }}:${{ steps.timestamp.outputs.tag }} ${{ env.REGISTRY }}/${{ env.IMAGE_NAME }}:latest
docker push ${{ env.REGISTRY }}/${{ env.IMAGE_NAME }}:${{ steps.timestamp.outputs.tag }}
docker push ${{ env.REGISTRY }}/${{ env.IMAGE_NAME }}:latest
echo "Published: ${{ env.REGISTRY }}/${{ env.IMAGE_NAME }}:${{ steps.timestamp.outputs.tag }}"
- name: Trigger webhook
run: curl -fS -X POST ${{secrets.WEBHOOK_ENDPOINT}}
```
Change these values:
| Value | Replace with | Example |
| --------------------------------------- | ------------------------------------------------------------------------------------- | -------------------------- |
| `GITHUB_ACCOUNT_NAME/DOCKER_IMAGE_NAME` | Your GitHub username or organisation, and a name for your image, **all in lowercase** | `acme-agency/acme-website` |
| `branches: [main]` | The branch that should deploy, if it isn’t `main` | `branches: [master]` |
You don’t need to create any secrets for GHCR: the workflow uses GitHub’s built-in `GITHUB_TOKEN`. If you push to a different registry such as Docker Hub or Azure Container Registry, use the matching workflow from our [GitHub Actions samples](https://github.com/UmbHost/GreenStack.CICD.Samples/tree/main/GitHub) instead. See [What Docker registries does GreenStack support?](/greenstack/what-docker-registries-does-greenstack-support/).
Commit the workflow and push it to `main`. Then open the **Actions** tab in your repository and watch it run.
> **The first run will fail at the “Trigger webhook” step. This is expected.** The webhook URL doesn’t exist until GreenStack has deployed your site once (Steps 4 and 5). As long as the **Build and push** step succeeded, your image is in GHCR and you can carry on.
***
## Step 4: Connect your registry and image in UmbPanel
[Section titled “Step 4: Connect your registry and image in UmbPanel”](#step-4-connect-your-registry-and-image-in-umbpanel)
### 4.1 Create a GitHub access token
[Section titled “4.1 Create a GitHub access token”](#41-create-a-github-access-token)
GreenStack needs read access to the image in GHCR.
1. In GitHub, go to **Settings → Developer settings → Personal access tokens → Tokens (classic)** and click **Generate new token (classic)**.
2. Enter a descriptive **Note**, for example `GreenStack image pull`.
3. Choose an **Expiration** date. You’ll need to update the token in UmbPanel when it expires.
4. Select only the **`read:packages`** scope.
5. Click **Generate token** and copy it. **GitHub only shows the token once.**
### 4.2 Add the registry in UmbPanel
[Section titled “4.2 Add the registry in UmbPanel”](#42-add-the-registry-in-umbpanel)
1. Log in to [UmbPanel](https://www.umbpanel.io) and open your GreenStack service.
2. On the **Docker Registries** card, click **Manage Registries**, then **Add Registry**.
3. Fill in the form:
| Field | What to enter |
| ------------------------- | ------------------------------------------------------------------------------------------------ |
| **Registry Provider** | **GitHub Container Registry** |
| **Name** | A name for this registry, typically your GitHub username in lowercase |
| **Username** | Your GitHub **username**, not your email address. It must be the account that created the token. |
| **Personal Access Token** | The token from Step 4.1 |
| **Organisation Name** | The GitHub organisation, if the repository belongs to one. Otherwise leave it blank. |
4. Click **Save Registry**.
### 4.3 Deploy your image for the first time
[Section titled “4.3 Deploy your image for the first time”](#43-deploy-your-image-for-the-first-time)
1. Go back to your service and, on the **Websites** card, click **Manage Websites**.
2. Under **Select a Registry**, choose the registry you just added and click **Save**.
3. In the **Deploy GreenStack** panel, enter your **Image Name**. Enter **only the image name**, in lowercase: not the registry, username or organisation, and no tag.
| Full image name in `main.yml` | Enter as **Image Name** |
| ----------------------------------------- | ----------------------- |
| `ghcr.io/acme-agency/acme-website:latest` | `acme-website` |
4. Click **Initialize GreenStack**. This takes several minutes while GreenStack pulls your image and deploys it for the first time.
GreenStack always deploys the `latest` tag, which the workflow pushes on every run.
***
## Step 5: Add the deploy webhook
[Section titled “Step 5: Add the deploy webhook”](#step-5-add-the-deploy-webhook)
Once that first deployment has completed, **Manage Websites** shows your service’s webhook URL under **Webhook Details**. Copy it, then in GitHub:
1. Go to your repository’s **Settings → Secrets and variables → Actions** and click **New repository secret**.
2. Name it `WEBHOOK_ENDPOINT` and paste the webhook URL as its value.
3. Go to the **Actions** tab, open the failed run and click **Re-run all jobs**.
This time every step should pass. From now on, every push to your deploy branch builds a new image and deploys it automatically.
> **Keep the webhook URL private.** Anyone who has it can trigger a deployment of your site.
See [Is there a webhook to automatically trigger the release?](/greenstack/is-there-a-webhook-to-automatically-trigger-the-release/) for more about the webhook.
***
## Step 6: Check your site
[Section titled “Step 6: Check your site”](#step-6-check-your-site)
Open your site’s **Preview URL** (a `*.umbpanel.io` address), which is shown on **Manage Websites** in UmbPanel.
* The first start can take a few minutes while Umbraco sets up the database. See [Why does my GreenStack site take a long time to boot?](/greenstack/why-does-my-greenstack-site-take-a-long-time-to-boot/).
* On a brand-new database, Umbraco asks you to create your first back office user.
* If you started from a starter kit, its sample content is installed on first start.
When you’re ready to go live with your own domain, open your service in UmbPanel and click **Manage Hostnames** to add your domain, or [open a support ticket](https://www.umbpanel.io/support-tickets/new) and we’ll help you set it up.
***
## Next steps
[Section titled “Next steps”](#next-steps)
* **Add a staging environment.** Each environment is its own GreenStack service deploying from its own branch, for example `staging` for staging and `main` for production. Promote changes with a pull request from `staging` into `main`.
* **Keep document types and settings in source control** with [uSync](https://marketplace.umbraco.com/package/usync), so they deploy with your code. Use uSync.Complete to move content between environments.
* **Scale to more replicas** for resilience: [open a support ticket](https://www.umbpanel.io/support-tickets/new) to ask us to add replicas. Umbraco 13 elects one replica to run scheduled tasks automatically, so no extra configuration is needed.
* **Use an AI assistant.** Our [GreenStack skill and UmbPanel MCP server](/greenstack/using-ai-assistants-with-greenstack/) can configure and deploy all of the above for you.
***
## Troubleshooting
[Section titled “Troubleshooting”](#troubleshooting)
### The first workflow run failed at the “Trigger webhook” step
[Section titled “The first workflow run failed at the “Trigger webhook” step”](#the-first-workflow-run-failed-at-the-trigger-webhook-step)
This is expected: the webhook only exists after the first deployment. Follow [Step 5](#step-5-add-the-deploy-webhook), then re-run the workflow.
### The workflow fails at the “Build and push” step
[Section titled “The workflow fails at the “Build and push” step”](#the-workflow-fails-at-the-build-and-push-step)
Open the failed step’s log. The most common causes are:
* **Project not found:** the `.csproj` path in your `Dockerfile` doesn’t match your repository. Paths are case-sensitive.
* **Locked mode restore failure:** if your project commits a `packages.lock.json`, it’s out of date. Run `dotnet restore --force-evaluate` locally and commit the updated lock file.
* **Image name errors:** the `IMAGE_NAME` in `main.yml` must be all lowercase.
### ”HTTPS is required” when opening the back office
[Section titled “”HTTPS is required” when opening the back office”](#https-is-required-when-opening-the-back-office)
One of the HTTPS changes is missing. Check you’ve completed [2.1](#21-trust-the-proxys-forwarded-headers-programcs), [2.2](#22-disable-the-https-health-check-appsettingsjson) and [2.3](#23-remove-the-https-runtime-validator).
### ”Invalid redirecturi” when logging in to the back office
[Section titled “”Invalid redirecturi” when logging in to the back office”](#invalid-redirecturi-when-logging-in-to-the-back-office)
GreenStack sets `Umbraco__CMS__Security__BackOfficeHost` to your preview URL. Remove any `BackOfficeHost` value from your own `appsettings` files. If the error appears after you’ve gone live on your own domain, [open a support ticket](https://www.umbpanel.io/support-tickets/new).
### Every page returns “Page not found” after deploying
[Section titled “Every page returns “Page not found” after deploying”](#every-page-returns-page-not-found-after-deploying)
Usually views aren’t precompiled (see [2.5](#25-run-in-production-mode-appsettingsproductionjson)), a view’s file name casing doesn’t match, or your root content node has no hostname. See [My site is showing page not found after deployment](/greenstack/my-site-is-showing-page-not-found-after-deployment/).
### Views, partials or Umbraco Forms are missing
[Section titled “Views, partials or Umbraco Forms are missing”](#views-partials-or-umbraco-forms-are-missing)
Linux is **case-sensitive**: `PartialAsync("MyPartial")` won’t find `myPartial.cshtml`. Match the casing of every view, partial and folder exactly. For Umbraco Forms and `App_Plugins`, see [2.6](#26-check-your-csproj).
### The site is down or redirects away from its umbpanel.io address
[Section titled “The site is down or redirects away from its umbpanel.io address”](#the-site-is-down-or-redirects-away-from-its-umbpanelio-address)
A `www` redirect is probably catching `*.umbpanel.io`, which fails GreenStack’s health check. See [2.8](#28-exclude-umbpanel-addresses-from-www-redirects).
### Where are my logs?
[Section titled “Where are my logs?”](#where-are-my-logs)
See [Why can’t I see my GreenStack logs in UmbPanel?](/greenstack/why-cant-i-see-my-greenstack-logs-umbpanel/) and [How do I access my GreenStack persisted files?](/greenstack/how-to-i-access-my-greenstack-persisted-files/).
***
## Need help?
[Section titled “Need help?”](#need-help)
* Browse the other [GreenStack articles](/greenstack/).
* [Open a support ticket](https://www.umbpanel.io/support-tickets/new) in UmbPanel.
* Ask questions or report problems with the samples on [GitHub](https://github.com/UmbHost/GreenStack.CICD.Samples/discussions).
**If you’d rather not do this yourself,** [**get in touch**](https://umbhost.net/gb/contact-us) **and we can handle the whole setup for you.**
# Getting Started with Umbraco 17 on GreenStack with GitHub
> Step-by-step guide to deploying Umbraco 17 to GreenStack with GitHub Actions: start from a template or starter kit, or add GreenStack support to an existing project.
This guide takes you from nothing (or an existing Umbraco 17 project) to a site running on GreenStack, deployed automatically from GitHub every time you push.
**If you’d rather not do this yourself,** [**get in touch**](https://umbhost.net/gb/contact-us) **and we can handle the whole setup for you.**
## The steps at a glance
[Section titled “The steps at a glance”](#the-steps-at-a-glance)
1. [Choose a starting point](#step-1-choose-a-starting-point): a ready-made template or starter kit, or your existing project.
2. [Configure an existing project](#step-2-configure-an-existing-project): only needed if you didn’t start from a template.
3. [Add the GitHub Actions workflow](#step-3-add-the-github-actions-workflow) and push your code.
4. [Connect your registry and image in UmbPanel](#step-4-connect-your-registry-and-image-in-umbpanel).
5. [Add the deploy webhook](#step-5-add-the-deploy-webhook) so every push deploys automatically.
6. [Check your site](#step-6-check-your-site).
## What you’ll need
[Section titled “What you’ll need”](#what-youll-need)
* A [GreenStack hosting service](https://umbhost.net/gb/sustainable-cloud-hosting/modern-umbraco-hosting) and access to [UmbPanel](https://www.umbpanel.io)
* A GitHub account and a repository for your site
* The [.NET 10 SDK](https://dotnet.microsoft.com/download/dotnet/10.0) and Git installed locally
* Optional: [Docker Desktop](https://www.docker.com/products/docker-desktop/), to test your image locally before pushing
## How GreenStack runs your site
[Section titled “How GreenStack runs your site”](#how-greenstack-runs-your-site)
GreenStack runs your site as a Docker container on [Docker Swarm](https://docs.docker.com/engine/swarm/), behind a [Traefik](https://traefik.io/traefik) reverse proxy and [Cloudflare](https://www.cloudflare.com). HTTPS is handled before traffic reaches your container, which receives plain HTTP on port `8080`. This is the setup [Umbraco recommends for Docker](https://docs.umbraco.com/umbraco-cms/fundamentals/setup/server-setup/running-umbraco-in-docker#https).
GreenStack configures a lot for you. **Don’t set any of these in your own `appsettings` files or Dockerfile**: GreenStack sets them as environment variables, and yours would conflict.
| Setting | What GreenStack does |
| ---------------------------------------------------------------------------------------- | ---------------------------------------------------------------------------- |
| `ConnectionStrings:umbracoDbDSN` | Points at the database provisioned for your service |
| `ASPNETCORE_ENVIRONMENT` | Set per environment, e.g. `Production` or `Staging` |
| `Umbraco:CMS:WebRouting:UmbracoApplicationUrl` and `Umbraco:CMS:Security:BackOfficeHost` | Set to your `*.umbpanel.io` preview URL |
| `Umbraco:CMS:Global:MainDomLock` | `SqlMainDomLock`, which is safe across multiple replicas |
| `Umbraco:CMS:Examine:LuceneDirectoryFactory` | `TempFileSystemDirectoryFactory`, so each replica keeps its own search index |
GreenStack also provides persistent storage for `wwwroot/media`, `umbraco/Logs`, `umbraco/Data` and `/app/keys`. Everything else in the container comes from your Docker image and is replaced on every deployment.
***
## Step 1: Choose a starting point
[Section titled “Step 1: Choose a starting point”](#step-1-choose-a-starting-point)
### Option A: start from a template or starter kit (recommended)
[Section titled “Option A: start from a template or starter kit (recommended)”](#option-a-start-from-a-template-or-starter-kit-recommended)
We publish ready-made Umbraco 17 projects with every GreenStack setting from Step 2 already in place, including the `Dockerfile` and `.dockerignore`. Pick the one closest to what you’re building:
| Starting point | What you get | GitHub template |
| --------------------- | --------------------------------------------------------------------------------------------------------------------------- | --------------------------------------------------------------------------------------------------- |
| **Blank** | A clean Umbraco 17 install | [GreenStack.Umbraco](https://github.com/UmbHost/GreenStack.Umbraco) |
| **Clean Starter Kit** | A complete blog-style site using the [Clean](https://marketplace.umbraco.com/package/clean) starter kit | [GreenStack.Umbraco.CleanStarterKit](https://github.com/UmbHost/GreenStack.Umbraco.CleanStarterKit) |
| **The Starter Kit** | Umbraco’s official [The Starter Kit](https://marketplace.umbraco.com/package/umbraco.thestarterkit) sample site | [GreenStack.Umbraco.TheStarterKit](https://github.com/UmbHost/GreenStack.Umbraco.TheStarterKit) |
| **UmBootstrap** | A Bootstrap-based site using [UmBootstrap](https://marketplace.umbraco.com/package/umbraco.community.templates.umbootstrap) | [GreenStack.Umbraco.UmBootstrap](https://github.com/UmbHost/GreenStack.Umbraco.UmBootstrap) |
There are two ways to use them.
**From GitHub:** open the template repository, click **Use this template** → **Create a new repository**, then clone your new repository.
**With `dotnet new`:** install the template and create a project. For example, for the Clean Starter Kit:
```bash
dotnet new install UmbHost.GreenStack.Umbraco.CleanStarterKit
dotnet new greenstack-umbraco-cleanstarterkit -n MyProject
```
`dotnet new` names the project after `-n`, and the `Dockerfile` is updated to match. Swap in the package and template name for the starting point you chose:
| Starting point | Package | Template name |
| ----------------- | -------------------------------------------- | ------------------------------------ |
| Blank | `UmbHost.GreenStack.Umbraco` | `greenstack-umbraco` |
| Clean Starter Kit | `UmbHost.GreenStack.Umbraco.CleanStarterKit` | `greenstack-umbraco-cleanstarterkit` |
| The Starter Kit | `UmbHost.GreenStack.Umbraco.TheStarterKit` | `greenstack-umbraco-thestarterkit` |
| UmBootstrap | `UmbHost.GreenStack.Umbraco.UmBootstrap` | `greenstack-umbraco-umbootstrap` |
Then create an empty repository on GitHub and push the project to it:
```bash
cd MyProject
git init -b main
git add .
git commit -m "Initial commit"
git remote add origin https://github.com/YOUR_ACCOUNT/YOUR_REPOSITORY.git
git push -u origin main
```
Your project is now configured for GreenStack. **Skip to [Step 3](#step-3-add-the-github-actions-workflow).**
### Option B: use your existing Umbraco 17 project
[Section titled “Option B: use your existing Umbraco 17 project”](#option-b-use-your-existing-umbraco-17-project)
Work through [Step 2](#step-2-configure-an-existing-project) to add the GreenStack configuration. Every snippet below is taken from the [blank template](https://github.com/UmbHost/GreenStack.Umbraco), so you can compare against a working project at any time.
***
## Step 2: Configure an existing project
[Section titled “Step 2: Configure an existing project”](#step-2-configure-an-existing-project)
> **Starting from a template?** Skip this step: it’s already done for you.
> **Shortcut:** the [UmbHost GreenStack NuGet package](/greenstack/what-does-the-umbhost-greenstack-nuget-package-do/) does most of this step for you. Install it with `dotnet add package UmbHost.GreenStack.Umbraco.Configuration` and you can skip [2.1](#21-trust-the-proxys-forwarded-headers-programcs) to [2.4](#24-persist-data-protection-keys), the Razor and Umbraco Forms parts of [2.6](#26-check-your-csproj), and [2.9](#29-configure-load-balancing-only-for-2-or-more-replicas) (load balancing needs version 1.1.0 or later). You still need 2.5, publishing `App_Plugins` in 2.6, 2.7, 2.8 and 2.10.
### 2.1 Trust the proxy’s forwarded headers (`Program.cs`)
[Section titled “2.1 Trust the proxy’s forwarded headers (Program.cs)”](#21-trust-the-proxys-forwarded-headers-programcs)
Your container only ever sees plain HTTP from the proxy. Without this change, Umbraco thinks every request is insecure, which breaks back office login, URL generation and security features.
Update `Program.cs` to configure and use the forwarded headers middleware. `app.UseForwardedHeaders()` must come before `app.UseUmbraco()`:
```csharp
using Microsoft.AspNetCore.HttpOverrides;
WebApplicationBuilder builder = WebApplication.CreateBuilder(args);
builder.Services.Configure(options =>
{
options.ForwardedHeaders = ForwardedHeaders.XForwardedFor | ForwardedHeaders.XForwardedProto;
options.KnownIPNetworks.Clear();
options.KnownProxies.Clear();
});
builder.CreateUmbracoBuilder()
.AddBackOffice()
.AddWebsite()
.AddComposers()
.Build();
WebApplication app = builder.Build();
await app.BootUmbracoAsync();
// Must come before UseUmbraco()
app.UseForwardedHeaders();
app.UseUmbraco()
.WithMiddleware(u =>
{
u.UseBackOffice();
u.UseWebsite();
})
.WithEndpoints(u =>
{
u.UseBackOfficeEndpoints();
u.UseWebsiteEndpoints();
});
await app.RunAsync();
```
Keep any other `.Add...()` calls and middleware your project already has. Only the `ForwardedHeadersOptions` block and `app.UseForwardedHeaders()` are new.
See [How to forward HTTPS headers](/greenstack/how-to-forward-https-headers/) for more detail.
### 2.2 Disable the HTTPS health check (`appsettings.json`)
[Section titled “2.2 Disable the HTTPS health check (appsettings.json)”](#22-disable-the-https-health-check-appsettingsjson)
Umbraco’s HTTPS health check fails behind a proxy, which blocks back office access. Disable it by ID inside your existing `Umbraco` → `CMS` section, and stop runtime minification from forcing HTTPS:
```json
{
"Umbraco": {
"CMS": {
"HealthChecks": {
"DisabledChecks": [
{
"Id": "EB66BB3B-1BCD-4314-9531-9DA2C1D6D9A7"
}
]
},
"RuntimeMinification": {
"UseHttps": false
}
}
}
}
```
> **Note:** The check ID is different in each Umbraco version. `EB66BB3B-1BCD-4314-9531-9DA2C1D6D9A7` is the ID for Umbraco 17.
See [How do I fix the HTTPS health check for GreenStack?](/greenstack/how-do-i-fix-the-https-health-check-for-greenstack/) for more detail.
### 2.3 Remove the HTTPS runtime validator
[Section titled “2.3 Remove the HTTPS runtime validator”](#23-remove-the-https-runtime-validator)
In Production runtime mode, Umbraco refuses to start unless HTTPS is configured in the application. GreenStack handles HTTPS before your container, so remove that validator. Create `Composers/DockerChecksRemoverComposer.cs`:
```csharp
using Umbraco.Cms.Core.Composing;
using Umbraco.Cms.Core.DependencyInjection;
using Umbraco.Cms.Infrastructure.Runtime.RuntimeModeValidators;
namespace MyProject.Composers;
public class DockerChecksRemoverComposer : IComposer
{
public void Compose(IUmbracoBuilder builder)
{
builder.RuntimeModeValidators()
.Remove();
}
}
```
Change the `namespace` to match your project. Composers run automatically at startup, so nothing else needs registering.
### 2.4 Persist Data Protection keys
[Section titled “2.4 Persist Data Protection keys”](#24-persist-data-protection-keys)
.NET uses Data Protection keys to encrypt login cookies and antiforgery tokens. Your container is replaced on every deployment, so the keys must be stored on GreenStack’s persistent `/app/keys` folder, or every deployment will log everyone out. Create `Composers/DataProtectionComposer.cs`:
```csharp
using Microsoft.AspNetCore.DataProtection;
using Microsoft.Extensions.DependencyInjection;
using Microsoft.Extensions.Hosting;
using Umbraco.Cms.Core.Composing;
using Umbraco.Cms.Core.DependencyInjection;
namespace MyProject.Composers;
public class DataProtectionComposer : IComposer
{
public void Compose(IUmbracoBuilder builder)
{
var environment = builder.Services.BuildServiceProvider()
.GetRequiredService();
var keysPath = (environment.IsProduction() || environment.IsStaging())
? "/app/keys"
: Path.Combine(environment.ContentRootPath, "DataProtection-Keys");
if (!Directory.Exists(keysPath))
{
Directory.CreateDirectory(keysPath);
}
builder.Services.AddDataProtection()
.PersistKeysToFileSystem(new DirectoryInfo(keysPath));
}
}
```
> **Important:** Keep both `IsProduction()` and `IsStaging()`. A staging environment on GreenStack also has the `/app/keys` folder, and leaving it out breaks logins there.
See [How to persist .NET Data Protection keys](/greenstack/how-to-persist-net-data-protection-keys/) for more detail.
### 2.5 Run in Production mode (`appsettings.Production.json`)
[Section titled “2.5 Run in Production mode (appsettings.Production.json)”](#25-run-in-production-mode-appsettingsproductionjson)
GreenStack sets `ASPNETCORE_ENVIRONMENT` to `Production`, so `appsettings.Production.json` is applied on top of `appsettings.json`. Use it to put Umbraco into [Production runtime mode](https://docs.umbraco.com/umbraco-cms/fundamentals/setup/server-setup/runtime-modes), which is faster and locks down settings that shouldn’t change on a live site:
```json
{
"$schema": "appsettings-schema.json",
"Serilog": {
"MinimumLevel": {
"Default": "Error"
}
},
"Umbraco": {
"CMS": {
"Runtime": {
"Mode": "Production"
},
"Hosting": {
"Debug": false
},
"ModelsBuilder": {
"ModelsMode": "Nothing"
}
}
}
}
```
Production runtime mode has some requirements of its own:
* **Views must be precompiled.** Remove `false` and `false` from your `.csproj` if they’re there. Otherwise every page returns **404 Page not found**.
* **Models must be compiled into your project.** `"ModelsMode": "Nothing"` (not `None`) means models aren’t generated on the live site. Make document type changes locally or in a development environment, then rebuild and redeploy.
> **Note:** Don’t add `UmbracoApplicationUrl`, `MainDomLock`, the Examine directory factory, a connection string or `UseHttps` here. GreenStack provides the first four, and HTTPS is handled by the proxy.
### 2.6 Check your `.csproj`
[Section titled “2.6 Check your .csproj”](#26-check-your-csproj)
Make sure the Razor files the back office needs are published:
```xml
true
```
If you use **Umbraco Forms**, its theme views aren’t included when views are precompiled, so copy them to the output. If you have **`App_Plugins`** extensions (custom dashboards and property editors), make sure they’re published too:
```xml
```
### 2.7 Add a `Dockerfile` and `.dockerignore`
[Section titled “2.7 Add a Dockerfile and .dockerignore”](#27-add-a-dockerfile-and-dockerignore)
Create a file named `Dockerfile` (no extension) in the **root of your repository**:
```dockerfile
FROM mcr.microsoft.com/dotnet/aspnet:10.0 AS base
WORKDIR /app
EXPOSE 8080
FROM mcr.microsoft.com/dotnet/sdk:10.0 AS build
ARG BUILD_CONFIGURATION=Release
WORKDIR /src
COPY . ./
RUN dotnet restore "MyProject/MyProject.csproj" --locked-mode
RUN dotnet build "MyProject/MyProject.csproj" -c $BUILD_CONFIGURATION --no-restore
FROM build AS publish
RUN dotnet publish "MyProject/MyProject.csproj" -c $BUILD_CONFIGURATION -o /app/publish /p:UseAppHost=false --no-build
FROM base AS final
WORKDIR /app
COPY --chown=1000:1000 --from=publish /app/publish .
RUN mkdir -p keys umbraco/Logs umbraco/Data wwwroot/media \
&& chown -R 1000:1000 keys umbraco wwwroot
USER 1000:1000
ENTRYPOINT ["dotnet", "MyProject.dll", "--console-logger-format=json"]
```
Replace the placeholders with your own project’s names:
| Placeholder | Replace with | Example |
| --------------------------------------- | ----------------------------------------------------------------- | ------------------------------ |
| `MyProject/MyProject.csproj` (3 places) | The path from the repository root to your web project’s `.csproj` | `src/Acme.Web/Acme.Web.csproj` |
| `MyProject.dll` | Your web project’s assembly name, usually the `.csproj` name | `Acme.Web.dll` |
> **Important:** Paths are case-sensitive on Linux. `src/acme.web/Acme.Web.csproj` won’t match `src/Acme.Web/Acme.Web.csproj`.
Keep the `1000:1000` user, port `8080` and the `mkdir` line: GreenStack relies on them. Don’t add `ASPNETCORE_ENVIRONMENT`, `ASPNETCORE_URLS` or connection strings to the Dockerfile.
Next, create `.dockerignore` in the root of your repository. It keeps build output, local data and secrets out of your image:
```text
# Git
.git
.gitignore
.gitattributes
*/.github
# Build outputs
**/bin/
**/obj/
**/out/
**/publish/
# Visual Studio / Rider
.vs/
.vscode/
.idea/
*.suo
*.user
*.userosscache
*.sln.docstates
*.userprefs
.idea/
# NuGet
*.nupkg
*.snupkg
packages/
.nuget/
# Test results
[Tt]est[Rr]esult*/
[Bb]uild[Ll]og.*
*.trx
*.coverage
# Umbraco specific
**/App_Data/
**/umbraco/Data/
**/umbraco/Logs/
**/wwwroot/media/
umbraco.config
# Node modules (if you have front-end build)
**/node_modules/
**/npm-debug.log
**/yarn-error.log
# OS files
.DS_Store
Thumbs.db
*.swp
*.swo
*~
# Docker
Dockerfile
.dockerignore
docker-compose*.yml
*.md
# CI/CD
.github/
.gitlab-ci.yml
azure-pipelines.yml
# Logs
*.log
logs/
# Environment files
.env
.env.*
!.env.example
```
The latest versions of both files are in our [GreenStack CI/CD samples](https://github.com/UmbHost/GreenStack.CICD.Samples) repository. See also [GreenStack starter Dockerfile](/greenstack/greenstack-starter-dockerfile/).
### 2.8 Exclude UmbPanel addresses from `www` redirects
[Section titled “2.8 Exclude UmbPanel addresses from www redirects”](#28-exclude-umbpanel-addresses-from-www-redirects)
Skip this if your site doesn’t redirect between `www` and non-`www`.
GreenStack checks your site’s health, and serves its preview, through its `*.umbpanel.io` address. If a redirect sends those requests to your own domain, the health check fails and your container is taken out of service, so **never redirect `*.umbpanel.io`**. Your site runs on Kestrel, not IIS, so there’s no `web.config`; add the redirect in `Program.cs` instead, listing **only your production domain**:
```csharp
using Microsoft.AspNetCore.Rewrite;
// Redirect www.example.com to example.com. UmbPanel addresses aren't listed,
// so the preview URL and health checks keep working.
var rewriteOptions = new RewriteOptions()
.AddRedirectToNonWwwPermanent("www.example.com");
app.UseRewriter(rewriteOptions);
```
For the opposite direction, use `AddRedirectToWwwPermanent("example.com")`. To use IIS-style `iisrewrite.xml` rules instead, see [How do I exclude UmbPanel domains from www redirects?](/greenstack/how-do-i-exclude-umbpanel-domains-from-www-redirects/).
### 2.9 Configure load balancing (only for 2 or more replicas)
[Section titled “2.9 Configure load balancing (only for 2 or more replicas)”](#29-configure-load-balancing-only-for-2-or-more-replicas)
Skip this if your site runs on a single replica, which is the default. Also skip it if you’ve installed version 1.1.0 or later of the [UmbHost GreenStack NuGet package](/greenstack/what-does-the-umbhost-greenstack-nuget-package-do/), which does all of it for you.
With 2 or more replicas, the back office runs on every replica, so your site needs all three parts of Umbraco’s [load balancing the back office](https://docs.umbraco.com/umbraco-cms/run-in-production/infrastructure-and-ops/server-setup/load-balancing/load-balancing-backoffice) guide below.
#### SignalR backplane
[Section titled “SignalR backplane”](#signalr-backplane)
The Umbraco 17 back office needs a shared SignalR backplane, or editors see **“No connection with that ID”** errors. Use your existing GreenStack database as the backplane, following Umbraco’s [using existing infrastructure](https://docs.umbraco.com/umbraco-cms/run-in-production/infrastructure-and-ops/server-setup/load-balancing/signalr-in-backoffice-load-balanced-environment#using-existing-infrastructure) approach. Add the `IntelliTect.AspNetCore.SignalR.SqlServer` NuGet package:
```bash
dotnet add package IntelliTect.AspNetCore.SignalR.SqlServer
```
Then create `Composers/SignalRComposer.cs`:
```csharp
using Umbraco.Cms.Core.Composing;
namespace MyProject.Composers;
public class SignalRComposer : IComposer
{
public void Compose(IUmbracoBuilder builder)
{
var connectionString = builder.Config.GetUmbracoConnectionString();
if (connectionString is null)
{
return;
}
builder.Services.AddSignalR().AddSqlServer(connectionString);
}
}
```
It reuses the connection string GreenStack provides, so there’s nothing to add to `appsettings`. See [How do I configure SignalR for multiple GreenStack replicas?](/greenstack/how-do-i-configure-signalr-for-multiple-greenstack-replicas/).
#### Make every replica a back office server
[Section titled “Make every replica a back office server”](#make-every-replica-a-back-office-server)
By default Umbraco elects one replica to be the “scheduling publisher” and makes the others “subscribers”. A subscriber never saves page URLs to the database, so a page published from its back office works until the next deploy or restart, then returns a 404 until you republish it. Tell Umbraco that every replica is a back office server. Create `Composers/LoadBalancedBackOfficeComposer.cs`:
```csharp
using Umbraco.Cms.Core.Composing;
using Umbraco.Cms.Core.DependencyInjection;
using Umbraco.Cms.Core.Sync;
using Umbraco.Cms.Infrastructure.DependencyInjection;
namespace MyProject.Composers;
public class LoadBalancedBackOfficeComposer : IComposer
{
public void Compose(IUmbracoBuilder builder)
{
builder.SetServerRegistrar(new StaticServerAccessor());
builder.LoadBalanceIsolatedCaches();
}
}
public class StaticServerAccessor : IServerRoleAccessor
{
public ServerRole CurrentServerRole => ServerRole.SchedulingPublisher;
}
```
`LoadBalanceIsolatedCaches()` keeps the back office’s caches in step, so editors on different replicas don’t see each other’s changes late. Scheduled publishing and webhooks still run once, not once per replica.
#### Store back office uploads on shared storage
[Section titled “Store back office uploads on shared storage”](#store-back-office-uploads-on-shared-storage)
Uploads in the back office are kept in a temporary folder until you save. By default that folder is inside `umbraco/Data/TEMP`, which is separate on each replica. Move it to storage every replica shares by adding this to `appsettings.Production.json`:
```json
{
"Umbraco": {
"CMS": {
"Hosting": {
"TemporaryFileUploadLocation": "/app/umbraco/Data/TemporaryFileUploads"
}
}
}
}
```
If your site already has replicas and some pages 404 after a restart, see [Why do new pages 404 after a deploy on a replicated GreenStack site?](/greenstack/why-do-new-pages-404-after-a-deploy-on-a-replicated-greenstack-site/)
### 2.10 Check that it builds
[Section titled “2.10 Check that it builds”](#210-check-that-it-builds)
Build in Release mode before you push. Production mode precompiles your views, so view errors (a missing model, a bad `@inherits`, a package that doesn’t support .NET 10) show up here rather than as 404s on your live site:
```bash
dotnet build -c Release
```
If you have Docker installed, build the image too. It’s the same build GreenStack’s workflow will run:
```bash
docker build -t my-site .
```
Commit your changes and push them to GitHub.
***
## Step 3: Add the GitHub Actions workflow
[Section titled “Step 3: Add the GitHub Actions workflow”](#step-3-add-the-github-actions-workflow)
The workflow builds your Docker image, pushes it to the GitHub Container Registry (GHCR), then tells GreenStack to deploy it.
Create `.github/workflows/main.yml` in your repository:
```yaml
name: Build and Push Docker Image
on:
push:
branches: [main]
workflow_dispatch:
env:
REGISTRY: ghcr.io
IMAGE_NAME: GITHUB_ACCOUNT_NAME/DOCKER_IMAGE_NAME
jobs:
build:
runs-on: ubuntu-latest
permissions:
contents: read
packages: write
steps:
- uses: actions/checkout@v5
with:
submodules: 'true'
- name: Log in to GHCR
uses: docker/login-action@v3
with:
registry: ghcr.io
username: ${{ github.actor }}
password: ${{ secrets.GITHUB_TOKEN }}
- name: Generate timestamp
id: timestamp
run: echo "tag=$(date +'%H%M%S%d%m%Y')" >> $GITHUB_OUTPUT
- name: Build and push
working-directory: ./
run: |
docker build -t ${{ env.REGISTRY }}/${{ env.IMAGE_NAME }}:${{ steps.timestamp.outputs.tag }} .
docker tag ${{ env.REGISTRY }}/${{ env.IMAGE_NAME }}:${{ steps.timestamp.outputs.tag }} ${{ env.REGISTRY }}/${{ env.IMAGE_NAME }}:latest
docker push ${{ env.REGISTRY }}/${{ env.IMAGE_NAME }}:${{ steps.timestamp.outputs.tag }}
docker push ${{ env.REGISTRY }}/${{ env.IMAGE_NAME }}:latest
echo "Published: ${{ env.REGISTRY }}/${{ env.IMAGE_NAME }}:${{ steps.timestamp.outputs.tag }}"
- name: Trigger webhook
run: curl -fS -X POST ${{secrets.WEBHOOK_ENDPOINT}}
```
Change these values:
| Value | Replace with | Example |
| --------------------------------------- | ------------------------------------------------------------------------------------- | -------------------------- |
| `GITHUB_ACCOUNT_NAME/DOCKER_IMAGE_NAME` | Your GitHub username or organisation, and a name for your image, **all in lowercase** | `acme-agency/acme-website` |
| `branches: [main]` | The branch that should deploy, if it isn’t `main` | `branches: [master]` |
You don’t need to create any secrets for GHCR: the workflow uses GitHub’s built-in `GITHUB_TOKEN`. If you push to a different registry such as Docker Hub or Azure Container Registry, use the matching workflow from our [GitHub Actions samples](https://github.com/UmbHost/GreenStack.CICD.Samples/tree/main/GitHub) instead. See [What Docker registries does GreenStack support?](/greenstack/what-docker-registries-does-greenstack-support/).
Commit the workflow and push it to `main`. Then open the **Actions** tab in your repository and watch it run.
> **The first run will fail at the “Trigger webhook” step. This is expected.** The webhook URL doesn’t exist until GreenStack has deployed your site once (Steps 4 and 5). As long as the **Build and push** step succeeded, your image is in GHCR and you can carry on.
***
## Step 4: Connect your registry and image in UmbPanel
[Section titled “Step 4: Connect your registry and image in UmbPanel”](#step-4-connect-your-registry-and-image-in-umbpanel)
### 4.1 Create a GitHub access token
[Section titled “4.1 Create a GitHub access token”](#41-create-a-github-access-token)
GreenStack needs read access to the image in GHCR.
1. In GitHub, go to **Settings → Developer settings → Personal access tokens → Tokens (classic)** and click **Generate new token (classic)**.
2. Enter a descriptive **Note**, for example `GreenStack image pull`.
3. Choose an **Expiration** date. You’ll need to update the token in UmbPanel when it expires.
4. Select only the **`read:packages`** scope.
5. Click **Generate token** and copy it. **GitHub only shows the token once.**
### 4.2 Add the registry in UmbPanel
[Section titled “4.2 Add the registry in UmbPanel”](#42-add-the-registry-in-umbpanel)
1. Log in to [UmbPanel](https://www.umbpanel.io) and open your GreenStack service.
2. On the **Docker Registries** card, click **Manage Registries**, then **Add Registry**.
3. Fill in the form:
| Field | What to enter |
| ------------------------- | ------------------------------------------------------------------------------------------------ |
| **Registry Provider** | **GitHub Container Registry** |
| **Name** | A name for this registry, typically your GitHub username in lowercase |
| **Username** | Your GitHub **username**, not your email address. It must be the account that created the token. |
| **Personal Access Token** | The token from Step 4.1 |
| **Organisation Name** | The GitHub organisation, if the repository belongs to one. Otherwise leave it blank. |
4. Click **Save Registry**.
### 4.3 Deploy your image for the first time
[Section titled “4.3 Deploy your image for the first time”](#43-deploy-your-image-for-the-first-time)
1. Go back to your service and, on the **Websites** card, click **Manage Websites**.
2. Under **Select a Registry**, choose the registry you just added and click **Save**.
3. In the **Deploy GreenStack** panel, enter your **Image Name**. Enter **only the image name**, in lowercase: not the registry, username or organisation, and no tag.
| Full image name in `main.yml` | Enter as **Image Name** |
| ----------------------------------------- | ----------------------- |
| `ghcr.io/acme-agency/acme-website:latest` | `acme-website` |
4. Click **Initialize GreenStack**. This takes several minutes while GreenStack pulls your image and deploys it for the first time.
GreenStack always deploys the `latest` tag, which the workflow pushes on every run.
***
## Step 5: Add the deploy webhook
[Section titled “Step 5: Add the deploy webhook”](#step-5-add-the-deploy-webhook)
Once that first deployment has completed, **Manage Websites** shows your service’s webhook URL under **Webhook Details**. Copy it, then in GitHub:
1. Go to your repository’s **Settings → Secrets and variables → Actions** and click **New repository secret**.
2. Name it `WEBHOOK_ENDPOINT` and paste the webhook URL as its value.
3. Go to the **Actions** tab, open the failed run and click **Re-run all jobs**.
This time every step should pass. From now on, every push to your deploy branch builds a new image and deploys it automatically.
> **Keep the webhook URL private.** Anyone who has it can trigger a deployment of your site.
See [Is there a webhook to automatically trigger the release?](/greenstack/is-there-a-webhook-to-automatically-trigger-the-release/) for more about the webhook.
***
## Step 6: Check your site
[Section titled “Step 6: Check your site”](#step-6-check-your-site)
Open your site’s **Preview URL** (a `*.umbpanel.io` address), which is shown on **Manage Websites** in UmbPanel.
* The first start can take a few minutes while Umbraco sets up the database. See [Why does my GreenStack site take a long time to boot?](/greenstack/why-does-my-greenstack-site-take-a-long-time-to-boot/).
* On a brand-new database, Umbraco asks you to create your first back office user.
* If you started from a starter kit, its sample content is installed on first start.
When you’re ready to go live with your own domain, open your service in UmbPanel and click **Manage Hostnames** to add your domain, or [open a support ticket](https://www.umbpanel.io/support-tickets/new) and we’ll help you set it up.
***
## Next steps
[Section titled “Next steps”](#next-steps)
* **Add a staging environment.** Each environment is its own GreenStack service deploying from its own branch, for example `staging` for staging and `main` for production. Promote changes with a pull request from `staging` into `main`.
* **Keep document types and settings in source control** with [uSync](https://marketplace.umbraco.com/package/usync), so they deploy with your code. Use uSync.Complete to move content between environments.
* **Scale to more replicas** for resilience: [open a support ticket](https://www.umbpanel.io/support-tickets/new) to ask us to add replicas. With 2 or more replicas, [configure load balancing](#29-configure-load-balancing-only-for-2-or-more-replicas) first.
* **Use an AI assistant.** Our [GreenStack skill and UmbPanel MCP server](/greenstack/using-ai-assistants-with-greenstack/) can configure and deploy all of the above for you.
***
## Troubleshooting
[Section titled “Troubleshooting”](#troubleshooting)
### The first workflow run failed at the “Trigger webhook” step
[Section titled “The first workflow run failed at the “Trigger webhook” step”](#the-first-workflow-run-failed-at-the-trigger-webhook-step)
This is expected: the webhook only exists after the first deployment. Follow [Step 5](#step-5-add-the-deploy-webhook), then re-run the workflow.
### The workflow fails at the “Build and push” step
[Section titled “The workflow fails at the “Build and push” step”](#the-workflow-fails-at-the-build-and-push-step)
Open the failed step’s log. The most common causes are:
* **Project not found:** the `.csproj` path in your `Dockerfile` doesn’t match your repository. Paths are case-sensitive.
* **Locked mode restore failure:** if your project commits a `packages.lock.json`, it’s out of date. Run `dotnet restore --force-evaluate` locally and commit the updated lock file.
* **Image name errors:** the `IMAGE_NAME` in `main.yml` must be all lowercase.
### ”HTTPS is required” when opening the back office
[Section titled “”HTTPS is required” when opening the back office”](#https-is-required-when-opening-the-back-office)
One of the HTTPS changes is missing. Check you’ve completed [2.1](#21-trust-the-proxys-forwarded-headers-programcs), [2.2](#22-disable-the-https-health-check-appsettingsjson) and [2.3](#23-remove-the-https-runtime-validator).
### ”Invalid redirecturi” when logging in to the back office
[Section titled “”Invalid redirecturi” when logging in to the back office”](#invalid-redirecturi-when-logging-in-to-the-back-office)
GreenStack sets `Umbraco__CMS__Security__BackOfficeHost` to your preview URL. Remove any `BackOfficeHost` value from your own `appsettings` files. If the error appears after you’ve gone live on your own domain, [open a support ticket](https://www.umbpanel.io/support-tickets/new).
### Every page returns “Page not found” after deploying
[Section titled “Every page returns “Page not found” after deploying”](#every-page-returns-page-not-found-after-deploying)
Usually views aren’t precompiled (see [2.5](#25-run-in-production-mode-appsettingsproductionjson)), a view’s file name casing doesn’t match, or your root content node has no hostname. See [My site is showing page not found after deployment](/greenstack/my-site-is-showing-page-not-found-after-deployment/).
### Views, partials or Umbraco Forms are missing
[Section titled “Views, partials or Umbraco Forms are missing”](#views-partials-or-umbraco-forms-are-missing)
Linux is **case-sensitive**: `PartialAsync("MyPartial")` won’t find `myPartial.cshtml`. Match the casing of every view, partial and folder exactly. For Umbraco Forms and `App_Plugins`, see [2.6](#26-check-your-csproj).
### The site is down or redirects away from its umbpanel.io address
[Section titled “The site is down or redirects away from its umbpanel.io address”](#the-site-is-down-or-redirects-away-from-its-umbpanelio-address)
A `www` redirect is probably catching `*.umbpanel.io`, which fails GreenStack’s health check. See [2.8](#28-exclude-umbpanel-addresses-from-www-redirects).
### Where are my logs?
[Section titled “Where are my logs?”](#where-are-my-logs)
See [Why can’t I see my GreenStack logs in UmbPanel?](/greenstack/why-cant-i-see-my-greenstack-logs-umbpanel/) and [How do I access my GreenStack persisted files?](/greenstack/how-to-i-access-my-greenstack-persisted-files/).
***
## Need help?
[Section titled “Need help?”](#need-help)
* Browse the other [GreenStack articles](/greenstack/).
* [Open a support ticket](https://www.umbpanel.io/support-tickets/new) in UmbPanel.
* Ask questions or report problems with the samples on [GitHub](https://github.com/UmbHost/GreenStack.CICD.Samples/discussions).
**If you’d rather not do this yourself,** [**get in touch**](https://umbhost.net/gb/contact-us) **and we can handle the whole setup for you.**
# GreenStack Starter Azure DevOps Pipelines
> You can find a starter Azure DevOps Pipelines in our samples GitHub repository linked below; you are free to add your frontend build steps to the file
You can find a starter Azure DevOps Pipelines in our samples GitHub repository linked below; you are free to add your frontend build steps to the file.
There are various samples for pushing to the below registries:
* DockerHub
* Azure Container Registry
* GitLab Container Registry
* GitHub Container Registry
* AWS ECR
* ProGet
* Quay
# GreenStack Starter Dockerfile
> You will need to add our Dockerfile to your project, we have pre-configured this for our GreenStack platform. If you customise the file, please leave the
You will need to add our `Dockerfile` to your project, we have pre-configured this for our GreenStack platform.
If you customise the file, please leave the `port` and `workdirs` as provided, these paths are what our system needs to allow your website to run.
You will need to change the `WEB_PROJECT_FOLDER/WEB_PROJECT_NAME.csproj` and `WEB_PROJECT_NAME.dll` to match your project name and path.
You can view and download the latest Dockerfile from our GitHub repository here:
# GreenStack Starter GitHub Actions Workflows
> You can find a starter GitHub Actions Workflows in our samples GitHub repository linked below; you are free to add your frontend build steps to the file
You can find a starter GitHub Actions Workflows in our samples GitHub repository linked below; you are free to add your frontend build steps to the file.
There are various samples for pushing to the below registries:
* DockerHub
* Azure Container Registry
* GitLab Container Registry
* GitHub Container Registry
* AWS ECR
* ProGet
* Quay
# How do I add a health check endpoint to my GreenStack site?
> Add ASP.NET Core's built-in health checks at /health, then set /health as your service's healthcheck path in UmbPanel so GreenStack only sends traffic to replicas that are ready.
GreenStack checks your site’s health so it only sends visitors to containers that are running properly. Give it a dedicated endpoint using ASP.NET Core’s built-in health checks, at `/health`.
## How GreenStack checks your site
[Section titled “How GreenStack checks your site”](#how-greenstack-checks-your-site)
There are two checks:
* **Container check.** Every GreenStack container requests `/health` on port `8080` every 30 seconds, after a 3-minute start-up grace period. This one is always on.
* **Load balancer check.** With **two or more replicas**, the load balancer requests a path on each replica every 10 seconds, and stops sending traffic to any replica that doesn’t respond in time with a success code. You choose the path in UmbPanel. If you haven’t set one, it uses `/`, your home page.
Checking `/` works, but it renders your whole home page every 10 seconds on every replica, and a slow page, a redirect or a content error takes healthy replicas out of rotation. A `/health` endpoint is cheap, always answers when the app is up, and matches the path the container check already uses.
## 1. Add the `/health` endpoint
[Section titled “1. Add the /health endpoint”](#1-add-the-health-endpoint)
### With the UmbHost GreenStack NuGet package (recommended)
[Section titled “With the UmbHost GreenStack NuGet package (recommended)”](#with-the-umbhost-greenstack-nuget-package-recommended)
Version **1.2.0 or later** of the [UmbHost GreenStack NuGet package](/greenstack/what-does-the-umbhost-greenstack-nuget-package-do/) adds `/health` for you, using ASP.NET Core’s built-in health checks. You don’t need to change any code. Install or upgrade it:
```bash
dotnet add package UmbHost.GreenStack.Umbraco.Configuration
```
The package answers `/health` before your site’s own redirects, login rules and content routing run, so none of them can get in the way. It’s only switched on inside the container, so `/health` doesn’t exist when you run the site locally from your IDE.
### Without the package
[Section titled “Without the package”](#without-the-package)
ASP.NET Core includes health checks, so there’s nothing extra to install. Register them in `Program.cs`, then map the endpoint **after** the `UseUmbraco()` block:
```csharp
var builder = WebApplication.CreateBuilder(args);
builder.CreateUmbracoBuilder()
.AddBackOffice()
.AddWebsite()
.AddComposers()
.Build();
builder.Services.AddHealthChecks();
var app = builder.Build();
await app.BootUmbracoAsync();
app.UseUmbraco()
.WithMiddleware(u =>
{
u.UseBackOffice();
u.UseWebsite();
})
.WithEndpoints(u =>
{
u.UseBackOfficeEndpoints();
u.UseWebsiteEndpoints();
});
app.MapHealthChecks("/health");
await app.RunAsync();
```
Keep your existing `Program.cs` and add just the two lines: `builder.Services.AddHealthChecks();` and `app.MapHealthChecks("/health");`. The example above is the Umbraco 17 template. Umbraco 13’s template also has `u.UseInstallerEndpoints();` in `WithEndpoints`, and the two lines go in the same places.
`/health` returns `200 Healthy` once the app is running. Check it locally by browsing to `https://localhost:/health`.
If you add the endpoint yourself, it must be:
* **Anonymous.** Don’t put it behind authentication or a members-only rule.
* **Never redirected.** Leave it out of `www`, trailing-slash and HTTPS redirects. See [How do I exclude UmbPanel domains from www redirects?](/greenstack/how-do-i-exclude-umbpanel-domains-from-www-redirects/).
* **Quick.** Don’t add checks that call slow or external services. This applies with the package too, because it includes any checks you register. If one of them fails, every replica is reported unhealthy at once and your site goes offline.
## 2. Deploy
[Section titled “2. Deploy”](#2-deploy)
Commit the change and deploy as usual. Once it’s live, browse to `https://.umbpanel.io/health` and you should see `Healthy`.
## 3. Set the healthcheck path in UmbPanel
[Section titled “3. Set the healthcheck path in UmbPanel”](#3-set-the-healthcheck-path-in-umbpanel)
1. Open your GreenStack service in UmbPanel.
2. Select **Healthcheck**.
3. Enter `/health` as the **Healthcheck Path**. Enter a path, not a full URL.
4. Select **Save Changes**.
The change applies once the deployment completes, and restarts your replicas.
The **Healthcheck** setting needs at least two replicas, because a health check only helps when there’s another replica to send traffic to.
## Troubleshooting
[Section titled “Troubleshooting”](#troubleshooting)
**My site went offline after setting the path.** Every replica is failing the check. Browse to `https://.umbpanel.io/health`:
* A `404` means the endpoint isn’t deployed. Check the new image has deployed, and that it has the GreenStack package at version 1.2.0 or later, or `app.MapHealthChecks("/health")` in `Program.cs`.
* A `503 Unhealthy` means one of your own registered health checks is failing.
* A redirect means a redirect rule is catching it. Exclude `/health` and `*.umbpanel.io` from the rule.
* A login page means the path needs authentication. Make it anonymous.
To get the site back while you fix it, open **Healthcheck** and either select **Disable Healthcheck** or set the path back to `/`.
## Related
[Section titled “Related”](#related)
* [What does the UmbHost GreenStack NuGet package do?](/greenstack/what-does-the-umbhost-greenstack-nuget-package-do/)
* [Getting Started with Umbraco 17 on GreenStack with GitHub](/greenstack/getting-started-with-umbraco-17-on-greenstack-with-github/)
* [Getting Started with Umbraco 13 on GreenStack with GitHub](/greenstack/getting-started-with-umbraco-13-on-greenstack-with-github/)
# How do I configure SignalR when running multiple GreenStack replicas?
> When a GreenStack site is scaled to 2 or more replicas, the Umbraco back office needs a shared SignalR backplane. This guide points you at the 'using existing infrastructure' approach from the Umbraco docs.
When you scale your GreenStack site beyond a single container, the Umbraco back office needs a shared SignalR backplane so editors connected to different replicas stay in sync.
## When you need this
[Section titled “When you need this”](#when-you-need-this)
You need to configure a SignalR backplane **only when your GreenStack service is running 2 or more replicas**. A single-replica site works fine with the default in-process SignalR and does not need any of the configuration below.
If you’re not sure how many replicas you’re running, check your service in [UmbPanel](https://www.umbpanel.io) — the replica count is shown on your site’s overview.
## How to configure it
[Section titled “How to configure it”](#how-to-configure-it)
Follow the **Using existing infrastructure** approach from the Umbraco documentation:
[SignalR in Backoffice Load Balanced Environment — Using existing infrastructure](https://docs.umbraco.com/umbraco-cms/run-in-production/infrastructure-and-ops/server-setup/load-balancing/signalr-in-backoffice-load-balanced-environment#using-existing-infrastructure)
That section walks through wiring the back office SignalR hub into your existing Umbraco SQL database — covering the required NuGet packages, the DI registration, and the configuration values.
> **Note:** GreenStack already provides the database that this approach uses as the backplane, so no additional infrastructure needs provisioning — just apply the configuration to your project.
## SignalR isn’t the only step
[Section titled “SignalR isn’t the only step”](#signalr-isnt-the-only-step)
On Umbraco 17, a site with 2 or more replicas also needs every replica set up as a back office server, and back office uploads stored on shared storage. Without the first, pages you publish can return a 404 after the next deploy. Follow [step 2.9 of the Umbraco 17 getting started guide](/greenstack/getting-started-with-umbraco-17-on-greenstack-with-github/#29-configure-load-balancing-only-for-2-or-more-replicas), which covers all three, and see [Why do new pages 404 after a deploy on a replicated GreenStack site?](/greenstack/why-do-new-pages-404-after-a-deploy-on-a-replicated-greenstack-site/).
## Related
[Section titled “Related”](#related)
* [Getting Started with Umbraco 17 on GreenStack with GitHub](/greenstack/getting-started-with-umbraco-17-on-greenstack-with-github/)
* [Why do new pages 404 after a deploy on a replicated GreenStack site?](/greenstack/why-do-new-pages-404-after-a-deploy-on-a-replicated-greenstack-site/)
* [Getting Started with Umbraco 13 on GreenStack with GitHub](/greenstack/getting-started-with-umbraco-13-on-greenstack-with-github/)
* [Are there delays when deploying to a replicated GreenStack service?](/greenstack/are-there-delays-when-deploying-to-a-replicated-greenstack-service/)
# How do I exclude UmbPanel domains from www redirects?
> A www redirect that rewrites the host breaks access via the umbpanel.io preview URL and fails GreenStack's load balancer health checks. Exclude all *.umbpanel.io domains from the redirect, with IIS rewrite and Program.cs examples.
If your site enforces a `www` → non-`www` redirect (or vice versa), you **must** exclude all `*.umbpanel.io` domains from that redirect when running on GreenStack.
## Why this matters
[Section titled “Why this matters”](#why-this-matters)
GreenStack serves your site — including the back office and the live preview — over `*.umbpanel.io` URLs. A redirect that rewrites the host has two consequences:
* **It breaks access through the preview URL.** Requests to your `*.umbpanel.io` address get redirected away to your production host, so you can no longer reach the back office or preview the site there.
* **It breaks the load balancer.** GreenStack’s health checks reach your container over its `*.umbpanel.io` domain. A redirect response (rather than a `200`) causes the check to fail, so your container is pulled out of rotation and the site goes down.
GreenStack runs your site on **Kestrel**, not IIS, so there is no `web.config`. There are two supported ways to set up the redirect — in both cases the goal is to ensure `*.umbpanel.io` is never redirected.
## Option 1 — `iisrewrite.xml`
[Section titled “Option 1 — iisrewrite.xml”](#option-1--iisrewritexml)
Umbraco can load IIS-style rewrite rules from an `iisrewrite.xml` file via the URL Rewrite middleware (see the [Umbraco URL Rewrites documentation](https://docs.umbraco.com/umbraco-cms/develop-with-umbraco/application-code/backend-and-custom-logic/routing/iisrewriterules)). Add a `negate` condition so `umbpanel.io` hosts are skipped:
```xml
```
Register it in `Program.cs` (for a `Startup.cs` project, add it in the `Configure` method using `env.ContentRootFileProvider`):
```csharp
using Microsoft.AspNetCore.Rewrite;
var rewriteOptions = new RewriteOptions()
.AddIISUrlRewrite(builder.Environment.ContentRootFileProvider, "iisrewrite.xml");
app.UseRewriter(rewriteOptions);
// On Linux, UseStaticFiles() must come AFTER the UseUmbraco() statements
// for the rewrites to take effect.
app.UseStaticFiles();
```
Make sure the file is copied to the build output in your `.csproj`:
```xml
Always
```
## Option 2 — Built-in redirect middleware in `Program.cs`
[Section titled “Option 2 — Built-in redirect middleware in Program.cs”](#option-2--built-in-redirect-middleware-in-programcs)
The ASP.NET Core rewrite middleware has built-in `www` redirect helpers. Pass **only your production host(s)** to the `domains` parameter — the rule then fires only for those hosts, so `*.umbpanel.io` is never matched and never redirected:
```csharp
using Microsoft.AspNetCore.Rewrite;
// Redirect www → non-www for your production host only.
// UmbPanel domains aren't listed, so preview URLs and health checks keep working.
var rewriteOptions = new RewriteOptions()
.AddRedirectToWww("example.com");
app.UseRewriter(rewriteOptions);
// On Linux, UseStaticFiles() must come AFTER the UseUmbraco() statements.
app.UseStaticFiles();
```
> **Note:** The examples show a `www` → non-`www` redirect. For the opposite direction use `AddRedirectToWwwPermanent` and list your bare domain (e.g. `example.com`). Either way, `*.umbpanel.io` must never be redirected.
## Related
[Section titled “Related”](#related)
* [Getting Started with Umbraco 17 on GreenStack with GitHub](/greenstack/getting-started-with-umbraco-17-on-greenstack-with-github/)
* [Getting Started with Umbraco 13 on GreenStack with GitHub](/greenstack/getting-started-with-umbraco-13-on-greenstack-with-github/)
# How do I fix the HTTPS Health Check for GreenStack?
> The health check must be removed via configuration, through the appsettings.json file, environment variables, or similar. The HstsCheck key is
The health check must be removed via configuration, through the `appsettings.json` file, environment variables, or similar.
The HstsCheck key is `E2048C48-21C5-4BE1-A80B-8062162DF124` so the appsettings will look something like:
```plaintext
"Umbraco": {
"CMS": {
"HealthChecks" : {
"DisabledChecks": [
{
"Id": "E2048C48-21C5-4BE1-A80B-8062162DF124"
}
]
},
{...}
```
# How do I fix the Runtime mode validator for GreenStack?
> The UseHttpsValidator must be removed through code. The code to remove the validator can look something like: using Umbraco.Cms.Core.Composing; using
The `UseHttpsValidator` must be removed through code.
The code to remove the validator can look something like:
```plaintext
using Umbraco.Cms.Core.Composing;
using Umbraco.Cms.Infrastructure.Runtime.RuntimeModeValidators;
namespace MySite;
public class DockerChecksRemover : IComposer
{
public void Compose(IUmbracoBuilder builder)
=> builder.RuntimeModeValidators().Remove();
}
```
# How should I configure Examine for GreenStack?
> When deploying Umbraco to GreenStack, it is important to ensure that not all files are stored in the file share- otherwise you will experience file
When deploying Umbraco to GreenStack, it is important to ensure that not all files are stored in the file share- otherwise you will experience file locking issues. Here are the folders and files that should not be replicated:
`~/umbraco/Data/TEMP/*`
You can achieve this by changing the value of the `LuceneDirectoryFactory` setting to ‘TempFileSystemDirectoryFactory’ in the `appsettings.json`.
Below is shown how to do this in a Json configuration source.
```plaintext
{
"Umbraco": {
"CMS": {
"Examine": {
"LuceneDirectoryFactory" : "TempFileSystemDirectoryFactory"
}
}
}
}
```
# How to Forward HTTPS headers
> Our GreenStack platform offloads SSL / HTTPS connections at the loadbalancer, this means that your site won't see the HTTPS connection by default. Simply
Our GreenStack platform offloads SSL / HTTPS connections at the loadbalancer, this means that your site won’t see the HTTPS connection by default.
Simply add the below code to your `Program.cs` file to make your website see the HTTPS headers:
```plaintext
builder.Services.Configure(options =>
{
options.ForwardedHeaders = ForwardedHeaders.XForwardedFor | ForwardedHeaders.XForwardedProto;
options.RequireHeaderSymmetry = false;
options.KnownIPNetworks.Clear();
options.KnownProxies.Clear();
});
app.UseForwardedHeaders();
```
# How to I access my GreenStack persisted files?
> Create an SFTP user in UmbPanel, then use the File Manager in your browser or connect with any SFTP client.
You can access your site’s persisted files (media, logs and Data Protection keys) with an SFTP user:
1. Open your service in [UmbPanel](https://www.umbpanel.io) and, on the **SFTP Users** card, click **Manage SFTP Users**.
2. Click **Create SFTP User** and follow the steps.
3. Either open the **File Manager** to browse your files in the browser, or connect with an SFTP client such as [FileZilla](https://filezilla-project.org/download.php) using the details and **Port Number** shown in UmbPanel.
Only the persistent folders are available over SFTP: `wwwroot/media`, `umbraco/Logs` and `keys`. Your site’s code, views and other files come from your Docker image, so change them in your repository and redeploy.
# How to persist .NET Data Protection keys
> There are a number of ways to persist .NET Data Protection keys, this article explains how to persist the keys to disk on our GreenStack platform. If you
There are a number of ways to persist .NET Data Protection keys, this article explains how to persist the keys to disk on our GreenStack platform.
If you with to persist to a SQL Database or Azure Blob storage please take a look at the [documentation found here](https://learn.microsoft.com/en-gb/aspnet/core/security/data-protection/implementation/key-storage-providers).
We have made persisting to disk super simple, simply add the below `DataProtectionComposer.cs` to your project:
## Umbraco V13
[Section titled “Umbraco V13”](#umbraco-v13)
```C#
using Microsoft.AspNetCore.DataProtection;
using Microsoft.Extensions.DependencyInjection;
using Microsoft.Extensions.Hosting;
using Umbraco.Cms.Core.Composing;
using Umbraco.Cms.Core.DependencyInjection;
namespace Abbeyfield.Core.Composers;
public class DataProtectionComposer : IComposer
{
public void Compose(IUmbracoBuilder builder)
{
var environment = builder.Services.BuildServiceProvider()
.GetRequiredService();
var keysPath = environment.IsProduction()
? "/app/keys"
: Path.Combine(environment.ContentRootPath, "DataProtection-Keys");
if (!Directory.Exists(keysPath))
{
Directory.CreateDirectory(keysPath);
}
builder.Services.AddDataProtection()
.PersistKeysToFileSystem(new DirectoryInfo(keysPath));
}
}
```
[You can find the most up to date file in the GitHub repository here](https://github.com/UmbHost/GreenStack.Umbraco-v13/blob/main/GreenStack.Umbraco/Composers/DataProtectionComposer.cs).
## Umbraco V17
[Section titled “Umbraco V17”](#umbraco-v17)
```C#
using Microsoft.AspNetCore.DataProtection;
using Microsoft.Extensions.DependencyInjection;
using Microsoft.Extensions.Hosting;
using Umbraco.Cms.Core.Composing;
using Umbraco.Cms.Core.DependencyInjection;
namespace UmbPanel.Core.Composers;
public class DataProtectionComposer : IComposer
{
public void Compose(IUmbracoBuilder builder)
{
var environment = builder.Services.BuildServiceProvider()
.GetRequiredService();
if (environment.IsProduction())
{
var keysPath = Path.Combine("/app/keys");
if (!Directory.Exists(keysPath))
{
Directory.CreateDirectory(keysPath);
}
builder.Services.AddDataProtection()
.PersistKeysToFileSystem(new DirectoryInfo(keysPath));
}
}
}
```
[You can find the most up to date file in the GitHub repository here](https://github.com/UmbHost/GreenStack.Umbraco/blob/main/GreenStack.Umbraco/Composers/DataProtectionComposer.cs).
This will ensure the composer is only run in the **Production** environment, allowing your local to run as normal, if you have named your environment something different that **Production** please ensure to update the code accordingly.
# I want to use SQLite or an external database, how do I do this?
> GreenStack manages your database connection string, so it can't be changed in UmbPanel. Open a support ticket if you need SQLite or an external database.
During initialisation, GreenStack connects your site to the database provisioned for your service. The connection string is set for you as the `ConnectionStrings__umbracoDbDSN` environment variable, which is managed by GreenStack and can’t be removed or changed under **Manage Environment Variables**.
If you need to use SQLite or an external SQL Server instead, please [open a support ticket](https://www.umbpanel.io/support-tickets/new) and we’ll discuss the options with you.
# Is there a Webhook to automatically trigger the release?
> Yes. Your webhook URL is under Webhook Details on Manage Websites in UmbPanel. Send an empty POST request to it to deploy the latest image.
Yes. Open your service in [UmbPanel](https://www.umbpanel.io), click **Manage Websites**, and copy the URL shown under **Webhook Details**.
Send an empty POST request to this URL to pull the latest version of your image and redeploy your site. For example:
```bash
curl -fS -X POST "YOUR_WEBHOOK_URL"
```
The webhook only appears after your site’s first deployment. Keep it private: anyone who has it can trigger a deployment.
You can also deploy by hand with the **Deploy Latest Image** button on the same page. See [Can I automatically trigger my GreenStack deployment?](/greenstack/can-i-automatically-trigger-my-greenstack-deployment/) for using it from CI/CD.
# Is there FTP or WebDeploy access to GreenStack persisted files?
> No. GreenStack uses SFTP instead: create an SFTP user in UmbPanel, then use the File Manager or any SFTP client.
No, GreenStack doesn’t support FTP or Web Deploy. Your site is deployed as a Docker image, and its persisted files are available over SFTP instead.
See [How do I access my GreenStack persisted files?](/greenstack/how-to-i-access-my-greenstack-persisted-files/) to create an SFTP user and use the File Manager.
# My site is showing Page Not Found after deployment
> GreenStack runs on Linux containers, which are case-sensitive. The two most common causes are mismatched View filename casing and a missing hostname on the root content node.
GreenStack runs on Linux containers, which - unlike Windows or Mac - treat file paths as case-sensitive. A site that renders fine locally can return Page Not Found once deployed if the casing of a file or hostname doesn’t match exactly.
There are two common causes:
## 1. View filenames don’t match the Document Type alias casing
[Section titled “1. View filenames don’t match the Document Type alias casing”](#1-view-filenames-dont-match-the-document-type-alias-casing)
This is the most common cause. Umbraco resolves a View by looking for a `.cshtml` file whose name matches the Document Type alias. On Windows or Mac this match is case-insensitive, so `home.cshtml` will resolve a `home` document type. On Linux it will not.
You can find the Document Type alias in the backoffice:

Check that every file under `Views/` matches that casing exactly. In the example below, `Home.cshtml` and `Page.cshtml` both start with a capital letter and would fail to resolve against lowercase `home` and `page` aliases on Linux:
So if the backoffice shows the alias as `home`, the View must be:
```text
Views/home.cshtml
```
not:
```text
Views/Home.cshtml
```
The same applies to any other Views, including `Page.cshtml`, `master.cshtml` and any custom templates.
## 2. The site’s hostname is not assigned in Culture and Hostnames
[Section titled “2. The site’s hostname is not assigned in Culture and Hostnames”](#2-the-sites-hostname-is-not-assigned-in-culture-and-hostnames)
If the site is multilingual, or has been built in a way that requires hostname-based routing (for example, multiple sites within a single Umbraco install), the deployed hostname must be assigned to the root content node.
In the backoffice, right-click the root node of the site and choose **Culture and Hostnames**, then add the hostname the site is being served on. Without this, Umbraco cannot resolve the incoming request to a content node and will return Page Not Found.
# Using AI assistants with GreenStack
> Use the official GreenStack Claude skill and UmbPanel MCP server to configure, deploy and manage Umbraco on GreenStack with an AI assistant.
GreenStack now has official AI tooling: a Claude **skill** that knows how to configure and deploy Umbraco on GreenStack, and a **Model Context Protocol (MCP) server** that lets an AI assistant act in your UmbPanel portal *as you* — reading your services, managing DNS, and triggering deploys.
Everything is distributed as free, open plugins in the public **UmbHost marketplace** (`github.com/UmbHost/claude-plugins`), and the MCP servers are listed in the official [MCP Registry](https://registry.modelcontextprotocol.io).
## What you can do with it
[Section titled “What you can do with it”](#what-you-can-do-with-it)
* **Set up a new site, or fix an existing one** — the `greenstack-umbraco-setup` skill configures an Umbraco **13 or 17** project for GreenStack correctly the first time: forwarded headers, the HTTPS/health-check settings, Data Protection keys, the Dockerfile and CI pipeline (for any Git provider and any Docker registry), and the SignalR backplane for a load-balanced backoffice.
* **Manage your hosting by chat** — with the UmbPanel MCP connected, the assistant can list your services, read a service’s status and deploy webhook, set the container registry and image, scale replicas, trigger deploys, and manage your Cloudflare DNS — all scoped to **your** account.
## Before you start
[Section titled “Before you start”](#before-you-start)
* An AI assistant that supports plugins/MCP — **[Claude Code](https://claude.com/claude-code)** is the fully supported option today.
* A **GreenStack** service in [UmbPanel](https://www.umbpanel.io).
* Your usual **UmbPanel member login** (you sign in through the normal portal login; the assistant only ever gets the access you already have).
## Install in Claude Code
[Section titled “Install in Claude Code”](#install-in-claude-code)
Add the marketplace once, then install the plugins:
```bash
claude plugin marketplace add UmbHost/claude-plugins
claude plugin install greenstack-umbraco@umbhost # the setup skill
claude plugin install umbpanel-mcp@umbhost # manage your hosting (optional)
```
The first time the assistant uses a management tool, it opens your browser to the UmbPanel login. Sign in as you normally would and approve the request — the assistant is then connected as you.
> You don’t need the MCP plugin to benefit from the skill. On its own, the skill does all the app-side configuration and walks you through the portal steps by hand. Add `umbpanel-mcp` when you want the assistant to carry out the UmbPanel steps for you.
## Example things to ask
[Section titled “Example things to ask”](#example-things-to-ask)
* *“Set this Umbraco 17 project up for GreenStack and get it deploying from GitHub.”*
* *“My backoffice says ‘HTTPS is required’ on the preview URL — fix it.”*
* *“We’re scaling to two replicas — what do I need for the load-balanced backoffice?”*
* *“Add an A record for blog.mysite.com to my zone.”* (the assistant shows a preview and asks before making any change)
* *“Deploy the latest image and tell me when the site is healthy.”*
## Search this knowledgebase from your assistant
[Section titled “Search this knowledgebase from your assistant”](#search-this-knowledgebase-from-your-assistant)
This knowledgebase also has its own MCP server, so your assistant can search and read these articles directly instead of guessing:
```bash
claude mcp add --transport http umbhost-kb https://kb.umbhost.net/mcp
```
It provides `search_docs`, `get_doc` and `list_docs` tools and needs no login. Assistants that don’t support MCP can read [llms.txt](https://kb.umbhost.net/llms.txt) instead, or [llms-full.txt](https://kb.umbhost.net/llms-full.txt) for every article in a single file.
## Other assistants
[Section titled “Other assistants”](#other-assistants)
* **The setup skill works in any assistant** that reads the `~/.agents/skills/` folder (including **OpenAI Codex** and **GitHub Copilot CLI**) — copy the `greenstack-umbraco-setup` folder from the marketplace repo into `~/.agents/skills/`. Full steps are in the plugin’s README.
* **The UmbPanel MCP server is listed in the MCP Registry**, so it’s discoverable in **VS Code / GitHub Copilot** and **Codex**. Connecting from those uses the public `umbraco-member` client; if you’d like help wiring it up, [contact support](https://umbhost.net/contact).
* **ChatGPT’s app connectors** aren’t supported yet — use Codex (OpenAI’s coding assistant) for agent-driven GreenStack work.
## Security & privacy
[Section titled “Security & privacy”](#security--privacy)
* The assistant acts **as your member account** and can only see and change **your own** services and DNS — the same things you can do in the portal. There is no admin or back-office access.
* **Destructive, billing and provisioning actions are confirmed first** — the assistant shows you a preview of exactly what will change and only proceeds when you say yes.
* Sign-in uses standard OAuth (with PKCE); you can review and revoke connected sessions from your UmbPanel account at any time.
## Troubleshooting
[Section titled “Troubleshooting”](#troubleshooting)
* **The login page didn’t appear / the connection says it isn’t authorised** — trigger a tool again to restart the sign-in, and make sure you complete the login in the browser.
* **The assistant suggests changing platform settings** (connection strings, `MainDomLock`, the application URL) — it shouldn’t; GreenStack injects those for you. If in doubt, don’t override them.
* Stuck? [Contact UmbHost support](https://umbhost.net/contact) and we’ll help.
# What Docker registries does GreenStack support?
> GreenStack supports the below registries: DockerHub Azure Container Registry GitLab Container Registry GitHub Container Registry AWS ECR ProGet Quay
GreenStack supports the below registries:
* DockerHub
* Azure Container Registry
* GitLab Container Registry
* GitHub Container Registry
* AWS ECR
* ProGet
* Quay
* Self-managed container registries
[Sample CI/CD files can be found on GitHub here](https://github.com/UmbHost/GreenStack.CICD.Samples "github.com").
# What does the UmbHost GreenStack NuGet package do?
> UmbHost.GreenStack.Umbraco.Configuration sets up an Umbraco 13 or 17 site to run on GreenStack: forwarded headers, HTTPS checks, Data Protection keys, view publishing and, for 2 or more replicas, load balancing. Install it and redeploy.
[UmbHost.GreenStack.Umbraco.Configuration](https://www.nuget.org/packages/UmbHost.GreenStack.Umbraco.Configuration) configures an Umbraco site to run correctly on GreenStack. Install it and redeploy. There’s nothing to add to `Program.cs`.
```bash
dotnet add package UmbHost.GreenStack.Umbraco.Configuration
```
It supports **Umbraco 13** (.NET 8) and **Umbraco 17** (.NET 10), and NuGet picks the right build for your site.
## When it applies
[Section titled “When it applies”](#when-it-applies)
The package switches itself on inside a container and stays off when you run the site from your IDE, so your local setup is unchanged. To force it on or off, set `GreenStack__Enabled` to `true` or `false`.
## What it sets up
[Section titled “What it sets up”](#what-it-sets-up)
| Setting | What it does |
| ----------------------------- | -------------------------------------------------------------------------------------------------------------------------------------------------------------------------------------------------------------------------------------------------------- |
| Forwarded headers | Trusts the `X-Forwarded-For` and `X-Forwarded-Proto` headers, so Umbraco sees HTTPS and the visitor’s real IP. HTTPS ends at the Cloudflare edge, not in your container |
| Health endpoint | Adds `/health` (**version 1.2.0 or later**) using ASP.NET Core’s built-in health checks, for GreenStack’s health probes. You then [set it as your healthcheck path in UmbPanel](/greenstack/how-do-i-add-a-health-check-endpoint-to-my-greenstack-site/) |
| HTTPS health checks | Turns off the “HTTPS Configuration” and HSTS health checks, which your container can’t pass because HTTPS is handled at the edge |
| HTTPS runtime validator | Removes the check that stops Production mode starting while `Global:UseHttps` is `false` (the Umbraco 13 default) |
| Data Protection keys | Stores keys in `/app/keys`, which every replica shares, so logins survive deploys and work on every replica |
| Single replica | Turns off server-role election when your site runs one replica, unless you’ve set it yourself |
| Umbraco Forms views | Copies `Views/Partials/Forms` into the published site, so forms don’t render blank |
| Razor files | Publishes the Razor files the back office needs, unless you’ve set it yourself |
| Build warning `GREENSTACK001` | Warns if your `.csproj` turns off view precompilation, which makes every page return a 404 in Production mode |
| Startup warnings | Logs a warning if the site isn’t in Production mode, if your `appsettings` sets something GreenStack provides (like the connection string), or if a load-balanced replica is set up wrongly |
### Load balancing (Umbraco 17, 2 or more replicas)
[Section titled “Load balancing (Umbraco 17, 2 or more replicas)”](#load-balancing-umbraco-17-2-or-more-replicas)
When your site runs 2 or more replicas, the package also sets up everything the Umbraco 17 back office needs to be load balanced:
| Setting | What it does |
| ------------------ | ----------------------------------------------------------------------------------------------------------------------------------------------------------------------------------------------------------------- |
| SignalR backplane | Uses your site’s database to keep back office connections in sync, so editors don’t see “No connection with that ID” |
| Server role | Makes every replica a back office server. Without this, pages published from some replicas [return a 404 after the next deploy](/greenstack/why-do-new-pages-404-after-a-deploy-on-a-replicated-greenstack-site/) |
| Back office caches | Keeps the back office’s caches in step between replicas |
| Upload folder | Stores back office uploads on storage every replica shares, unless you’ve set `Hosting:TemporaryFileUploadLocation` yourself |
The load balancing settings need **version 1.1.0 or later**. UmbPanel tells your site how many replicas it runs through the `GreenStack__Replicas` environment variable, so normally there is nothing to configure. If your site was set up before UmbPanel added that variable, it may be missing, and the package then quietly skips these settings. Check your service’s environment variables in UmbPanel. A normal deploy doesn’t add it. To add it, edit any environment variable on the service, or save its deployment delay or health check settings without changing them. Either restarts your replicas with the variable in place. If that doesn’t add it, [open a support ticket](https://www.umbpanel.io/support-tickets/new) and we’ll sort it out.
Your own configuration always wins: anything marked “unless you’ve set it yourself” only fills a gap.
## Settings
[Section titled “Settings”](#settings)
Both are optional. Set them as environment variables on your service in [UmbPanel](https://www.umbpanel.io).
| Variable | Default | Meaning |
| ------------------------------------ | ----------------- | ------------------------------------- |
| `GreenStack__Enabled` | On in a container | Force the package on or off |
| `GreenStack__DataProtectionKeysPath` | `/app/keys` | Where Data Protection keys are stored |
If your site deliberately compiles views at runtime outside Production mode, add `true` to your `.csproj` to silence `GREENSTACK001`.
## What you still set up yourself
[Section titled “What you still set up yourself”](#what-you-still-set-up-yourself)
The package covers configuration only. These stay in your project:
* **Production mode** in every environment, including staging: `Runtime:Mode` = `Production`, `ModelsBuilder:ModelsMode` = `Nothing` (not `None`) and `Hosting:Debug` = `false`.
* **Your `Dockerfile`**, running as user `1000` on port `8080`.
* **Versioned asset URLs**, such as `asp-append-version="true"`, because Cloudflare caches static files.
* **Redirects** that leave your `umbpanel.io` address alone, because the preview URL uses it.
* **Your healthcheck path in UmbPanel.** Set it to `/health` once the package is deployed. See [How do I add a health check endpoint to my GreenStack site?](/greenstack/how-do-i-add-a-health-check-endpoint-to-my-greenstack-site/).
* **`App_Plugins`** extensions, which you still need to publish from your `.csproj`.
Leave the application URL, back office host, MainDom lock, Examine directory factory, connection string and `ASPNETCORE_ENVIRONMENT` out of your configuration. GreenStack provides them.
## Already configured your site by hand?
[Section titled “Already configured your site by hand?”](#already-configured-your-site-by-hand)
If you followed the getting started guide before this package existed, you can replace those steps with it. Remove your own versions of what the package does first, so the same thing isn’t set up twice:
* forwarded headers
* the HTTPS health check settings
* the HTTPS validator removal
* the Data Protection composer
* on Umbraco 17, the SignalR and load balancing composers and `TemporaryFileUploadLocation`
Removing your own **Data Protection composer** matters most. If both are left in place, they can disagree about where the keys are stored, and the keys may end up on one replica’s local disk. Logins then stop working when a request reaches another replica, or after a deploy.
## Related
[Section titled “Related”](#related)
* [Getting Started with Umbraco 17 on GreenStack with GitHub](/greenstack/getting-started-with-umbraco-17-on-greenstack-with-github/)
* [Getting Started with Umbraco 13 on GreenStack with GitHub](/greenstack/getting-started-with-umbraco-13-on-greenstack-with-github/)
* [Why do new pages 404 after a deploy on a replicated GreenStack site?](/greenstack/why-do-new-pages-404-after-a-deploy-on-a-replicated-greenstack-site/)
# Why can't I see my GreenStack logs UmbPanel?
> Overview If you're unable to see logs in the UmbPanel log viewer, or the log view appears empty, this is typically because your Umbraco application is
### Overview
[Section titled “Overview”](#overview)
If you’re unable to see logs in the UmbPanel log viewer, or the log view appears empty, this is typically because your Umbraco application is configured to write logs to files on disk rather than to the container’s console output. UmbPanel displays logs from the console output (stdout/stderr) which Docker captures automatically.
### Why This Happens
[Section titled “Why This Happens”](#why-this-happens)
By default, many Umbraco applications are configured to write logs to the `/umbraco/Logs` directory as files. While this works fine for traditional hosting, containerized applications should write logs to console output for better visibility and management.
### Quick Check
[Section titled “Quick Check”](#quick-check)
Your application is likely logging to files if:
* The UmbPanel log viewer is empty or shows no recent activity
* You have log files in your `/umbraco/Logs` directory
* Your `appsettings.json` includes a “File” sink in the Serilog configuration
### Solution
[Section titled “Solution”](#solution)
You need to configure your Umbraco application to write logs to the console.
# Why do new pages 404 after a deploy on a replicated GreenStack site?
> On an Umbraco 17 GreenStack site with 2 or more replicas, pages you publish can work at first, then return a 404 after the next deploy or restart until you republish them. This explains why and how to fix it.
This affects Umbraco 17 sites running **2 or more replicas**. You publish a new page and it works, but after the next deploy or restart it returns a 404. Republishing brings it back, until the next restart. Rebuilding the database cache, the memory cache or the Examine indexes doesn’t help.
## Why it happens
[Section titled “Why it happens”](#why-it-happens)
When several servers share one database, Umbraco elects one of them to be the “scheduling publisher” and makes the others “subscribers”. Since Umbraco 17.4, a subscriber never saves page URLs to the database: it assumes the scheduling publisher has done that. On GreenStack the back office runs on every replica, so you can publish from a subscriber, and then nothing saves the new page’s URL.
The page still works at first, because every replica keeps its URLs in memory. When a replica restarts, it reloads its URLs from the database. The new page isn’t there, so it returns a 404.
Umbraco’s answer is that when the back office is load balanced, every server must be a scheduling publisher (see [Umbraco issue #23569](https://github.com/umbraco/Umbraco-CMS/issues/23569)).
## How to fix it
[Section titled “How to fix it”](#how-to-fix-it)
Add the load balancing configuration from [step 2.9 of the Umbraco 17 getting started guide](/greenstack/getting-started-with-umbraco-17-on-greenstack-with-github/#29-configure-load-balancing-only-for-2-or-more-replicas) and deploy it. The part that fixes this is the `LoadBalancedBackOfficeComposer`, which makes every replica a scheduling publisher.
Or install version 1.1.0 or later of the [UmbHost GreenStack NuGet package](/greenstack/what-does-the-umbhost-greenstack-nuget-package-do/), which sets this up for you when your site runs 2 or more replicas.
## Repair the pages that are already affected
[Section titled “Repair the pages that are already affected”](#repair-the-pages-that-are-already-affected)
The fix stops new pages being affected. Pages published before it still have no saved URL. To see which ones, run this against your site’s database:
```sql
SELECT n.id, n.uniqueId, n.text, n.path
FROM umbracoDocument d
JOIN umbracoNode n ON n.id = d.nodeId
WHERE d.published = 1
AND n.trashed = 0
AND NOT EXISTS (SELECT 1 FROM umbracoDocumentUrl u
WHERE u.uniqueId = n.uniqueId AND u.isDraft = 0)
ORDER BY n.path;
```
Once the fix is deployed to every replica, run the following, then restart your site in [UmbPanel](https://www.umbpanel.io). Umbraco rebuilds every page URL when it starts:
```sql
DELETE FROM umbracoKeyValue WHERE [key] = 'UmbracoUrlGeneration';
```
Run the first query again afterwards. It should return no rows.
If you’d rather we did this for you, [open a support ticket](https://www.umbpanel.io/support-tickets/new).
## Related
[Section titled “Related”](#related)
* [Getting Started with Umbraco 17 on GreenStack with GitHub](/greenstack/getting-started-with-umbraco-17-on-greenstack-with-github/)
* [What does the UmbHost GreenStack NuGet package do?](/greenstack/what-does-the-umbhost-greenstack-nuget-package-do/)
* [How do I configure SignalR when running multiple GreenStack replicas?](/greenstack/how-do-i-configure-signalr-for-multiple-greenstack-replicas/)
* [Are there delays when deploying to a replicated GreenStack service?](/greenstack/are-there-delays-when-deploying-to-a-replicated-greenstack-service/)
# Why does my GreenStack site take a long time to boot?
> Long boot times on GreenStack are usually caused by the default .NET file watcher. Setting the DOTNET_USE_POLLING_FILE_WATCHER environment variable to true
Long boot times on GreenStack are usually caused by the default .NET file watcher struggling with the container’s filesystem.
This is resolved by the following environment variable:
```plaintext
DOTNET_USE_POLLING_FILE_WATCHER=true
```
This switches .NET to a polling-based file watcher, which performs reliably on containerised and network-backed filesystems and avoids the long delays seen during startup.
This variable is set by default on GreenStack, but you can confirm it is present in UmbPanel under your service’s environment variables. If it is missing, please contact support.
# Can you host my Umbraco Cloud version 7, 8 or 9+ website?
> Yes, we can host your Umbraco version 7, 8 or 9+ website created within Umbraco Cloud. Please note you will lose the Umbraco Deploy feature, we recommend
Yes, we can host your Umbraco version 7, 8 or 9+ website created within Umbraco Cloud.
**Please note you will lose the Umbraco Deploy feature, we recommend [uSync Complete](https://jumoo.co.uk/usync/complete/) as a replacement.**
# Can you provide a page to view the external uptime report for my website?
> Yes, we can provide a page where you can view the externally monitored uptime for your website.Please note the uptime measured is not the final number we
Yes, we can provide a page where you can view the externally monitored uptime for your website.
Please note the uptime measured is not the final number we use for our SLA, this is due to factors outside of our control such as website deployments or the ability to suspend a website with the control panel.
If you wish to have this page made available, please [open a support ticket](https://www.umbpanel.io/support-tickets/new) with the subject “Uptime monitoring page request”
# Do you support PHP or WordPress?
> We support PHP on our UmbOne (Linux) packages, you can browse these here.
We support PHP on our UmbOne (Linux) packages, you can [browse these here](https://umbhost.net/hosting/linux-hosting).
# Do you support xStatic?
> Yes, we can host your xStatic website
Yes, we can host your [xStatic](https://our.umbraco.com/packages/backoffice-extensions/xstatic/) website
# Does your Windows hosting support .NET Core?
> Yes, we support every LTS version of .NET Core with the inclusion of .NET 5 which is fully supported.
Yes, we support every [LTS version of .NET Core](https://docs.microsoft.com/en-us/lifecycle/products/microsoft-net-and-net-core) with the inclusion of .NET 5 which is fully supported.
# How are the backups handled?
> We backup our servers nightly within the datacenter to block storage, we also backup nightly to Microsoft Azure. Our SQL servers are backed up nightly
We backup our servers nightly within the datacenter to block storage, we also backup nightly to Microsoft Azure.
Our SQL servers are backed up nightly within the datacenter to block storage, we also backup nightly to Google Cloud.
All backups are stored for 7 days.
# How can I view my error log on UmbOne using .NET Core or .NET 5+ ?
> To output your .NET Core or .NET 5+ errors to a disk file you will need to set the stdoutLogEnabled and stdoutLogFile attributes within the web.config In
To output your .NET Core or .NET 5+ errors to a disk file you will need to set the stdoutLogEnabled and stdoutLogFile attributes within the web.config
In your web.config you will need to update the aspNetCore attribute to look similar to below by adding the attributes in bold:
You can read more about this in the [Microsoft Documentation here](https://learn.microsoft.com/en-us/aspnet/core/host-and-deploy/iis/logging-and-diagnostics?view=aspnetcore-7.0)
# How do I change file permissions on my website?
> UmbOne package instructions: You can change the file permissions on your website via SolidCP. Head to SolidCP Click Hosting Space Menu on the left-hand
**UmbOne package instructions:**
You can change the file permissions on your website via SolidCP.
Log in to SolidCP: open your service in [UmbPanel](https://www.umbpanel.io), then under **Manage Website** click **Open Control Panel**.
Click **Hosting Space Menu** on the left-hand side of the control panel.
Then click **File Manager**
Browse to so that you can see the folder / file you wish to change permissions on, then click the padlock icon. In the Pop-up Window which opens, set the permissions as required
Finally click **Set Permissions**
**Linux and WPOne package instructions:**
Open your service in [UmbPanel](https://www.umbpanel.io) and click **Control Panel** to open StackCP.
Click **File Manager**, then change the permissions of your file or folder from there.
# How do I check UmbHost service status?
> You or your customers can check the status of the UmbHost platform on our Status page: http://status.umbhost.net/ If we're carrying-out maintenance, this
You or your customers can check the status of the UmbHost platform on our Status page:
If we’re carrying-out maintenance, this is where you can receive progress updates.
In the unlikely event we experience any issues, this is where status messages will be published.
# How do I set up a scheduled task?
> You can set up a scheduled task within the SolidCP control panel. Head to SolidCP Click Hosting Space Menu on the left-hand side of the control panel
You can set up a scheduled task within the SolidCP control panel.
Log in to SolidCP: open your service in [UmbPanel](https://www.umbpanel.io), then under **Manage Website** click **Open Control Panel**.
Click **Hosting Space Menu** on the left-hand side of the control panel.
Then click **Scheduled Tasks**
Next click **Add Scheduled Task** on the right-hand side of the control panel, then fill out the form as you require.
Use the **Check Web Site Availability** task type if you would like to trigger a specific URL on your website.
Finally click **Save**
# How do I set up multi-factor authentication (MFA) in SolidCP?
> Turn on MFA for your SolidCP login so a code is needed as well as your password, either sent by email or from an authenticator app.
Multi-factor authentication (MFA) protects your Windows hosting control panel, SolidCP, by asking for a one-time code as well as your password when you log in. You can receive the code by email, or use an authenticator app such as Microsoft Authenticator, Google Authenticator or 1Password.
## Before you start
[Section titled “Before you start”](#before-you-start)
MFA codes are sent to the **primary email address** on your SolidCP account, so make sure it’s one you can access. You can check it on the same page where you turn MFA on (step 2 below).
## Turn on MFA
[Section titled “Turn on MFA”](#turn-on-mfa)
1. Log in to SolidCP: open your service in [UmbPanel](https://www.umbpanel.io), then under **Manage Website** click **Open Control Panel**.
2. Click the **person icon** (or your user name) in the top-right corner to open your account details.
3. Tick **Enable MFA**.
MFA is now on. Next time you log in, a validation code is emailed to your primary email address, and you’ll need to enter it after your password.
## Use an authenticator app instead of email (recommended)
[Section titled “Use an authenticator app instead of email (recommended)”](#use-an-authenticator-app-instead-of-email-recommended)
An authenticator app works even if you can’t get to your email, and stops codes being sent by email.
1. On the same page, with **Enable MFA** ticked, click **Show QR-Code**.
2. Open your authenticator app, add a new account and scan the QR code. If you can’t scan it, enter the key shown next to the QR code instead.
3. Type the 6-digit code from your app into the box below the QR code and click **Validate Activation Pin**.
Once the PIN is validated, SolidCP asks for a code from your authenticator app each time you log in.
## Troubleshooting
[Section titled “Troubleshooting”](#troubleshooting)
### The Enable MFA option is greyed out
[Section titled “The Enable MFA option is greyed out”](#the-enable-mfa-option-is-greyed-out)
Your account isn’t allowed to change its own MFA setting. Please [open a support ticket](https://www.umbpanel.io/support-tickets/new) and we’ll help.
### I’ve lost my authenticator app or can’t receive the email
[Section titled “I’ve lost my authenticator app or can’t receive the email”](#ive-lost-my-authenticator-app-or-cant-receive-the-email)
Please [open a support ticket](https://www.umbpanel.io/support-tickets/new) from UmbPanel, choosing your Windows hosting service as the **Related Service**. We’ll verify your identity and reset MFA for you.
### ”Validate Activation Pin” says the PIN is wrong
[Section titled “”Validate Activation Pin” says the PIN is wrong”](#validate-activation-pin-says-the-pin-is-wrong)
Check the clock on your phone is set automatically: authenticator codes depend on the correct time. Then enter the newest code shown in the app, before it changes.
# I am getting error "The key {....} was not found in the key ring" in my Umbraco V9+ logs
> If you are seeing the following exception in your Umbraco V9+ logs: Unhandled exception. System.Security.Cryptography.CryptographicException: The key
If you are seeing the following exception in your Umbraco V9+ logs:
```plaintext
Unhandled exception. System.Security.Cryptography.CryptographicException: The key {....} was not found in the key ring
```
We will need to change a setting on your websites application pool, please contact support to resolve this
# I have updated my DNS and now I get an SSL error
> If you have updated your DNS and are not using our nameservers please read the below articles to ensure you have configured them correctly: Can I use my
If you have updated your DNS and are not using our nameservers please read the below articles to ensure you have configured them correctly:
[Can I use my own Cloudflare account?](/domain-names-dns/can-i-use-my-own-cloudflare-account/)
[Can I use my own non-Cloudflare DNS provider?](/domain-names-dns/can-i-use-my-own-non-cloudflare-dns-provider/)
If you are using our nameservers and DNS please [open a support ticket](https://www.umbpanel.io/support-tickets/new)
# I'm getting Cloudflare DNS Error 1016
> If you have migrated from a provider which uses Cloudflare SaaS, or an enterprise Cloudflare subscription then you may recieve the following error: Error
If you have migrated from a provider which uses Cloudflare SaaS, or an enterprise Cloudflare subscription then you may recieve the following error:
Error 1016 Origin DNS Error

In order to solve this error you will need to get in contact with your previous hosting provider a request that they remove your domain name from their Cloudflare account.
# Is Ucommerce supported on your platform?
> Yes, Ucommerce is fully supported on our platform.
Yes, [Ucommerce](https://ucommerce.net/) is fully supported on our platform.
# Is UmbOne configured for 32Bit or 64Bit application pools?
> By default the application pools for UmbOne are configured to run in 32Bit mode, if you require these to be changed to 64Bit mode please contact support
By default the application pools for UmbOne are configured to run in 32Bit mode, if you require these to be changed to 64Bit mode please contact support
# Is URL Rewrite installed?
> Yes, as standard URL Rewrite is available and installed on our servers.
Yes, as standard URL Rewrite is available and installed on our servers.
# Is Vendr supported on your platform?
> Yes, Vendr is fully supported on our platform
Yes, [Vendr](https://vendr.net/) is fully supported on our platform
# My Umbraco Forms files are accessible without being logged in
> If you self-manage your zone follow the steps below: Cloudflare by default caches all static assets, most files uploaded via Umbraco Forms will be classed
If you self-manage your zone follow the steps below:
Cloudflare by default caches all static assets, most files uploaded via Umbraco Forms will be classed as a static file and will be cached in the CDN after the first load.
To stop this from happening add a Cache rule to your Cloudflare zone to exclude the path:
/media/forms/upload/\*

If we manage your zone please open a support ticket.
# My Umbraco site is returning an error of: "Cannot load libwebp.dll"
> Older versions of Umbraco relied on Image Processor and a plugin called ImageProcessor.Plugins.WebP to be able to show images in webp format. If you are
Older versions of Umbraco relied on Image Processor and a plugin called ImageProcessor.Plugins.WebP to be able to show images in webp format.
If you are seeing the error:
Cannot load libwebp.dll Description: An unhandled exception occurred during the execution of the current web request. Please review the stack trace for more information about the error and where it originated in the code.
Exception Details: System.ApplicationException: Cannot load libwebp.dll
Please open a support ticket and we will be able to resolve this quickly for you.
# My website Application Pool keeps stopping, why is this?
> A per our Acceptable Use Policy and Terms and Conditions, by default all websites have a memory limit of 2048 megabytes (2GB). When this memory limit is
A per our [Acceptable Use Policy](https://umbhost.co.uk/acceptable-use-policy/) and [Terms and Conditions](https://umbhost.co.uk/terms-conditions/), by default all websites have a memory limit of 2048 megabytes (2GB).
When this memory limit is reached our servers will recycle the Application Pool, the servers will only recycle the Application Pool a set amount of times within a short period of time before completely stopping the Application Pool.
The reason for this is to restrict any effect on other customer websites.
We will happily increase the memory limit on a per website basis.
Please open a support ticket with the reason you require the memory limit increased, and one of our support team will look into it.
# [VIDEO] How to Deploy Your Umbraco Site to UmbHost from AppVeyor
> Paul Seal over at codeshare.co.uk has made a video to show how to get started on our hosting service using AppVeyor.
Paul Seal over at [codeshare.co](https://codeshare.co/).uk has made a video to show how to get started on our hosting service using AppVeyor.
[](https://www.youtube.com/watch?v=SCSYBV1I_1Y)
# What are the Umbraco file / folder permissions and how do I set them?
> You can change the file permissions on your website via SolidCP. Head to SolidCP Click Hosting Space Menu on the left-hand side of the control panel. Then
You can change the file permissions on your website via SolidCP.
Log in to SolidCP: open your service in [UmbPanel](https://www.umbpanel.io), then under **Manage Website** click **Open Control Panel**.
Click **Hosting Space Menu** on the left-hand side of the control panel.
Then click **File Manager**
Browse to so that you can see the folder / file you wish to change permissions on, then click the padlock icon.
In the Pop-up Window which opens, set the permissions as required
Finally click **Set Permissions**
**Umbraco 6, 7 and 8 permissions**
| File / folder | Permission | Comment |
| ----------------------------------------------------------------------------------------------------------------------------------------- | ------------ | ------- |
| /Web.config | Read / Write | |
| Only needed for setting database and version Information during installation. So can be set to read-only afterwards for enhanced security | | |
\| | /App\_Code | Read / Write |
This folder and its files are used for dynamically loading in and generating dlls
\| | /App\_Data | Read / Write |
This folder and its files are used for cache and storage
\| | /App\_Plugins | Read / Write |
This folder and its files are used by packages
\| | /Bin | Read / Write |
Needed for installing packages, if no packages are installed, this can be set to read access only
\| | /Config | Read / Write |
Only needed for setting database and version Information during installation. So can be set to read-only afterwards for enhanced security
\| | /Css | Read / Write |
This folder and its files are used for css files
\| | /Media | Read / Write |
This folder and its files are used for media files uploaded via Umbraco CMS interface
\| | /Scripts | Read / Write |
This folder and its files are used for script files
\| | /Umbraco | Read / Write |
For upgrades and package installation, it can be set to read-only afterwards
\| | /Views | Read / Write |
This folder and its files are used for template, partial view and macro files
|
**Umbraco 9+ permissions**
| File / folder | Permission | Comment |
| ----------------------------------------------------------------------------------------------------------------------------------------- | --------------------- | ------- |
| /appSettings\*.json | Modify / Full control | |
| Only needed for setting database and a global identifier during installation. So can be set to read-only afterwards for enhanced security | | |
\| | /App\_Plugins | Modify / Full control |
Should always have modify rights as the folder and its files are used by packages
\| | /umbraco | Modify / Full control |
Should always have modify rights as the folder and its files are used for cache and storage
\| | /Views | Modify / Full control |
Should always have modify rights as the folder and its files are used for template, partial view and macro files
\| | /wwwroot/css | Modify / Full control |
Should always have modify rights as the folder and its files are used for css files
\| | /wwwroot/media | Modify / Full control |
Should always have modify rights as the folder and its files are used for media files uploaded via Umbraco CMS interface
\| | /wwwroot/scripts | Modify / Full control |
Should always have modify rights as the folder and its files are used for script files
\| | /wwwroot/umbraco | Modify / Full control |
For upgrades and package installation, it should have modify rights, but can be set to read-only afterwards
|
# What do I do if I believe a site is in breach of UmbHost's policies?
> UmbHost impose a strict Acceptable Use Policy and Terms of Service which customers must adhere-to. These cover illegal activities, prohibit certain
UmbHost impose a strict [Acceptable Use Policy](https://umbhost.co.uk/acceptable-use-policy/) and [Terms of Service](https://umbhost.co.uk/terms-conditions/) which customers must adhere-to. These cover illegal activities, prohibit certain content hosted through us and includes a zero-tolerance spam policy.
A UmbHost customer breaking these terms and conditions could have our services withdrawn from them, and potentially be reported to the authorities for illegal activity.
If you suspect any UmbHost customer of abusing our rules, you should report to them to us.
Please open a support ticket to notify us.
# What is my temporary URL?
> When you order a hosting package you’re given a temporary URL. Your temporary URL will be in the format of ‘USERNAME.umbhost.dev’
When you order a hosting package you’re given a temporary URL.
Your temporary URL will be in the format of ‘USERNAME.umbhost.dev’
# What version of Windows do you run?
> We run Windows Server 2019 for our web servers, we run Ubuntu 20.04 for our SQL Servers. We are in the process of introducting Windows Server 2022 for our
We run Windows Server 2019 for our web servers, we run Ubuntu 20.04 for our SQL Servers.
We are in the process of introducting Windows Server 2022 for our web servers.
# What versions of .NET Framework do you support?
> We support every version of .NET Framework from 3.5.
We support every version of .NET Framework from 3.5.
# What versions of Umbraco do you support?
> We officially support every version of Umbraco 7+, older versions may work on our platform but we cannot provide any support for these
We officially support every version of [Umbraco](https://umbraco.com/) 7+, older versions may work on our platform but we cannot provide any support for these
# Why am I seeing this error: Microsoft.AspNetCore.Antiforgery.AntiforgeryValidationException: The antiforgery token could not be decrypted.
> If you see the error: Microsoft.AspNetCore.Antiforgery.AntiforgeryValidationException: The antiforgery token could not be decrypted. We will need to tweak
If you see the error:
Microsoft.AspNetCore.Antiforgery.AntiforgeryValidationException: The antiforgery token could not be decrypted.
We will need to tweak a setting on the server for your website’s application pool, please [open a support ticket](https://www.umbpanel.io/support-tickets/new) with the subject “AntiforgeryValidationException”, choosing the affected website as the **Related Service**.
This error will not affect the day-to-day running of your website, however, it will cause noise in your website logs.
# Can you migrate my website?
> Yes, if your current hosting provider is willing to work with us we can handle the whole migration process. If however, your current hosting provider is
Yes, if your current hosting provider is willing to work with us we can handle the whole migration process.
If however, your current hosting provider is not willing to work with us, then we will require your current webroot and database zipped.
Please note if your website uses any external services such as Azure Function Apps, or custom server components then we cannot takeover your website hosting.
# Can you takeover my Umbraco hosting?
> Yes, we can host any simple Umbraco website, the minimum required to host your Umbraco website with us, is your current webroot folder and your database
Yes, we can host any simple Umbraco website, the minimum required to host your Umbraco website with us, is your current webroot folder and your database zipped.
If your current hosting provider / agency is willing to work with us, we can handle the whole migration process on your behalf.
Please note if your website uses any external services such as Azure Function Apps, or custom server components then we cannot takeover your website hosting.
# How to convert an Umbraco Cloud project into a standard Umbraco project
> Cloning the environment from Umbraco Cloud Clone down the environment with the content and code you want, to your local machine. Do a restore when you
## Cloning the environment from Umbraco Cloud
[Section titled “Cloning the environment from Umbraco Cloud”](#cloning-the-environment-from-umbraco-cloud)
Clone down the environment with the content and code you want, to your local machine. Do a restore when you spin up the site locally - this will give you all the data, content and media.
> **NOTE:** if you wish to have the database in SQL Server instead of SQL CE you need to set the connection string before you spin the site up the first time.
### [](https://dev.to/mastrup/moving-away-from-umbraco-cloud-39g6#an-alternative-way-to-move-content)An alternative way to move content
[Section titled “An alternative way to move content”](#an-alternative-way-to-move-content)
On some older solutions I have experienced issues with restoring from Umbraco Cloud. Instead of troubleshooting to fix the issue(s), I found it easier to connect directly to the SQL database and do a database export. Afterwards I can import the database to wherever I need to place it.
> You find the SQL connection details in the Umbraco Cloud Portal. Make sure to add your IP address to the SQL Azure firewall (also from the portal).
## [](https://dev.to/mastrup/moving-away-from-umbraco-cloud-39g6#removing-umbraco-cloud-settings)Removing Umbraco Cloud settings
[Section titled “Removing Umbraco Cloud settings”](#removing-umbraco-cloud-settings)
After getting all your data, content and media you are now ready to remove all settings related to Umbraco Cloud.
### [](https://dev.to/mastrup/moving-away-from-umbraco-cloud-39g6#cleaning-your-configs)Cleaning your configs
[Section titled “Cleaning your configs”](#cleaning-your-configs)
Start by removing the Deploy reference in web.config:
```plaintext
```
### [](https://dev.to/mastrup/moving-away-from-umbraco-cloud-39g6#removing-cloud-specific-files)Removing Cloud specific files
[Section titled “Removing Cloud specific files”](#removing-cloud-specific-files)
The following Umbraco Deploy related files needs to be removed:
* `Config/UmbracoDeploy.config`
* `Config/UmbracoDeploy.Settings.config`
* `bin/Umbraco.Deploy.Cloud.dll`
* `bin/Umbraco.Deploy.Contrib.Connectors.dll`
* `bin/Umbraco.Deploy.dll`
* `bin/Umbraco.Deploy.Forms.dll`
* `bin/Umbraco.Deploy.UI.dll`
* The `/Deploy` folder in `App_Plugins`
If you are running Umbraco 7, you also need to remove the Deploy section in the Dashboard.config file
```plaintext
content
/App_Plugins/Deploy/views/dashboards/dashboard.html
```
## [](https://dev.to/mastrup/moving-away-from-umbraco-cloud-39g6#a-note-on-umbraco-forms)A note on Umbraco Forms
[Section titled “A note on Umbraco Forms”](#a-note-on-umbraco-forms)
If you want to continue using Umbraco Forms outside of Umbraco Cloud, you need to purchase a license.
The forms license file needs to be placed in
```plaintext
```
Unless you change this.
# Can force HTTPS be disabled?
> Yes, we can disable force HTTPS on request, we however strongly advise against this. Please open a support ticket to request this.
Yes, we can disable force HTTPS on request, we however strongly advise against this.
Please open a support ticket to request this.
# Can I use a third-party SSL certificate?
> Yes: if you have an existing external or third-party SSL certificate you can use this at UmbHost. Your certificate provider will need to provide the
Yes: if you have an existing external or third-party SSL certificate you can use this at UmbHost.
Your certificate provider will need to provide the following sections for us to be able to install the SSL certificate:
Certificate
Private Key
CA Bundle / Intermediate Certificate
Please open a support ticket to request this.
# How can I generate a Certificate Signing Request (CSR)?
> When ordering an SSL certificate, you’re often required to generate a Certificate Signing Request (CSR). This is an encoded block of text that the
When ordering an SSL certificate, you’re often required to generate a Certificate Signing Request (CSR). This is an encoded block of text that the Certificate Authority require when issuing an SSL certificate. It contains information about the organization, domain name and locality.
Using a CSR Generator
The easiest way to generate a CSR is to use the online generator here:
You will need to make sure that you keep a record of both the CSR and Private Key that are provided to you.
# Is a SSL certificate included?
> Yes, a FREE SSL certificate is included as standard, we also enable the force HTTPS setting.
Yes, a FREE SSL certificate is included as standard, we also enable the force HTTPS setting.
# Can I change the domain or directory my license uses?
> Yes. UmbCheckout licences are checked against the site's domain and directory. Open a support ticket in UmbPanel to change them or add a domain.
Yes. UmbCheckout licences are checked against the domain and directory your site runs on. You can see the domains and directories registered to each licence in [UmbPanel](https://www.umbpanel.io) under **Licenses**.
To change them, or to add a domain, please [open a support ticket](https://www.umbpanel.io/support-tickets/new) in UmbPanel with the subject “Reissue License”, listing the domains you need.
Things to know about domains:
* **Domains must match exactly.** `www.mysite.com` and `mysite.com` are different domains, and wildcards aren’t supported, so list every domain the site is served on.
* **Some domains need no add-on:** the `www.` and non-`www.` versions of a domain, redirect domains and staging-only host names are free, but they still need adding to the licence.
* **Extra production domains need a domain add-on** if the same shop is served on more than one production domain. A separate shop needs its own licence.
# Can I extend or add my own payment gateway?
> Yes, you can find the source-code for our Stripe one at the URL below, you can use this as an example to build your own
Yes, you can find the source-code for our Stripe one at the URL below, you can use this as an example to build your own:
To change or check UmbCheckout’s data without changing UmbCheckout itself, see **Extending UmbCheckout** in the [UmbCheckout documentation](https://docs.umbcheckout.net/).
We cannot provide any help or support to extend or add your own payment gateways.
# How can I get a developer license?
> Every paid UmbCheckout licence includes one development licence for a staging or testing site. Request it with a support ticket in UmbPanel. Local development needs no licence.
**On your own machine you don’t need a licence.** UmbCheckout runs in **development mode**, with the licensed features switched on and the licence status showing **Development**, when:
* the site’s address is local (`localhost`, a `*.localhost` or `*.local` name, or a loopback address),
* it’s a **Debug build** running in the **`Development`** environment,
* there’s no live Stripe key in the configuration and no live Stripe checkout has been made, and
* every request so far has come from your own machine.
**For a staging or testing site**, each paid licence includes one **development licence**. To get it, [open a support ticket](https://www.umbpanel.io/support-tickets/new) in UmbPanel. **Please include the domains to be added to the licence in your request.** A development licence mustn’t be used to run a live shop.
On UmbCheckout versions **before 1.6.0**, the development licence can be used on localhost, \*.local or \*.mypc domains; on any other domain it’s valid for 60 days. From 1.6.0, and on UmbCheckout 17, it works like a normal licence for the domains listed on it.
You can buy a paid licence at [umbcheckout.net](https://umbcheckout.net). GreenStack hosting includes a licence for Umbraco 10, 13 and 17, which is only valid for sites hosted on GreenStack and ends with the hosting. Production and staging licences are available on request for every domain hosted on an active UmbHost hosting package.
Don’t have an UmbPanel account yet? [Create one here](https://www.umbpanel.io/register).
For full details, see **Getting Started → Development Licenses** in the [UmbCheckout documentation](https://docs.umbcheckout.net/).
# How long is a Developer license valid for?
> From UmbCheckout 1.6.0, and on UmbCheckout 17, a development licence works like a normal licence for the domains it lists. Before 1.6.0 it works on local domains, or for 60 days elsewhere.
It depends on your version of UmbCheckout:
* **UmbCheckout 1.6.0 and later, and UmbCheckout 17:** the development licence included with your paid licence works like a normal licence for the domains and folder listed on it. There’s no 60 day limit.
* **UmbCheckout versions before 1.6.0:** the development licence can be used on localhost, \*.local or \*.mypc domains. On any other domain it’s valid for 60 days.
Licences that come with a hosting package are only valid for the life of the hosting subscription.
On your own machine you don’t need a licence at all: see [How can I get a developer license?](/umbcheckout/how-can-i-get-a-developer-license/).
# My license is returning an invalid error, why is this?
> UmbCheckout licences are checked against the site's domain, directory and number of running instances. Check the License Status in the backoffice to see why.
UmbCheckout licences are checked against the domain and directory your site runs on, and the number of instances running it. You can see the reason under **Settings → UmbCheckout → Configuration** in the Umbraco backoffice, where the **License Details** show the licence status:
| Status | What to check |
| ------------------------------ | -------------------------------------------------------------------------------------------------------------------------------------------------------------------------------------- |
| **Domain not licensed** | The request is for a domain that isn’t on the licence. Domains must match exactly: `www.mysite.com` and `mysite.com` are different. |
| **Not licensed for this site** | The licence is active but doesn’t cover this site: the domain or directory doesn’t match, or a debugger is attached. |
| **Invalid** | The key isn’t valid for this site, or the licence has no room for another running instance. Each extra instance (for example a second load-balanced container) needs a replica add-on. |
| **Expired** or **Suspended** | The subscription has ended or been suspended. |
| **Unlicensed** | There’s no licence key, `Umbraco:CMS:WebRouting:UmbracoApplicationUrl` isn’t set to the site’s address, or the licence hasn’t been checked yet. |
On **UmbCheckout 13**, a licence bought as a one-off purchase before 14 October 2026 stops working from version 1.6.0. You can convert it to an annual licence in [UmbPanel](https://www.umbpanel.io).
Once you’ve fixed the cause, click **Re-Check License** on the same screen to check again straight away. If your server restricts outgoing traffic, allow HTTPS to `www.umbpanel.io`, where the licence server runs.
You can see the domains and directories registered to each licence in [UmbPanel](https://www.umbpanel.io) under **Licenses**. To change them, please [open a support ticket](https://www.umbpanel.io/support-tickets/new) with the subject “Reissue License”.
For full details, see **Getting Started → Licensing** in the [UmbCheckout documentation](https://docs.umbcheckout.net/).
# What payment gateways are supported?
> At the moment only the Stripe payment gateway is supported. Stripe provides support for a number of other payment gateways out of the box, you can find
At the moment only the Stripe payment gateway is supported.
Stripe provides support for a number of other payment gateways out of the box, you can find the list at the URL below:
# Where can I download or view the source code for UmbCheckout?
> You can find the source code for the open-source parts of the package on GitHub here: https://github.com/UmbHost/UmbCheckout
You can find the source code for the open-source parts of the package on GitHub here:
# Where can I download UmbCheckout?
> You can find the compiled files for UmbCheckout on NuGet here: https://www.nuget.org/packages?q=UmbCheckout Alternatively, you can download them on GitHub
You can find the compiled files for UmbCheckout on NuGet here:
Alternatively, you can download them on GitHub here:
# Where can I find the documentation for UmbCheckout?
> You can find the documentation on the dedicated website here: https://docs.umbcheckout.net/
You can find the documentation on the dedicated website here: